|
Return to Index for 2005 |
March 25 to April 25, 2005
Dallas Kitchen Renovation Project
For a long time, I have been wanting to redo my kitchen here in Dallas. Everything in it is the original equipment that came with the house over twenty years ago, and it is all dated. While everything works, everything could work better. On my wish list are a new double oven, a ceramic cooktop instead of burners, getting rid of the trash compactor, getting a new, quieter dishwasher, getting a new sink and fixtures and, finally, replacing all the tile counters and backsplashes with granite- giving a seamless work surface.
Earlier this year, I noticed that Barry Wood had someone at his house making some changes to his own kitchen. I asked if I could take a look, and I liked what they were doing. I met his contractor/worker Steve Gosdin, talked with him a bit, and arranged for him to come by my own house as his schedule at Barry's permitted to talk to me about my own plans.
When he got to a stopping place with Barry, he did come over and we discussed the kitchen plans. He drew up a proposal, we got it signed, and arranged for a start date in late March- the 28th as it turned out. We set some tasks that I would do- such as shopping for the appliances that I wanted, removing the cabinet fronts and hardware so that Steve could take them for refinishing and, of course, clearing out everything from the cabinets in the kitchen.
I spent a couple of weeks doing all the shopping and, when Steve gave me a firm start date for him to start work, Monday, March 28th, I began the process of taking off the cabinet fronts at the end of the week before (since I would be up at Fred's on Saturday and Sunday, I had to get this done by Thursday).
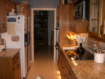
So, by Thursday morning I had taken all the cabinet fronts off. Before I started to remove everything from the cabinets themselves, I took a series of pictures of the old kitchen so I could remember how everything had been before the renovation. Thumbnails for those pictures I took on Friday are below; to view the full-size images, just click on those thumbnails:
On the rest of this album page you will find thumbnails for the various pictures and movies that I took of the renovation process. I have organized the pictures by day, moving forward through the project. Each thumbnail has a description, and of course you can view the full-size image by clicking on the thumbnail. When you get to the end, you might want to come back to the pictures above and compare the old and new.
March 28, 2005
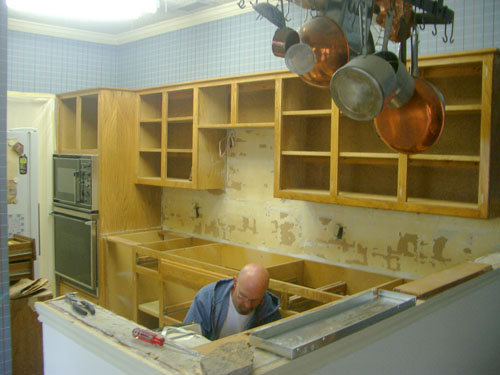
Today, Steve and Richard have arrived to begin the process of tearing out my old kitchen. I've already removed everything from the cabinets, and I also took off all the cabinet fronts so that Steve could take them off-site to refinish them. Now the guys are
attacking the tile on the walls
as the first step in the tearout.
When I left for my Mom's to have lunch, Steve and Richard had
removed much of the tile.
They had started this process in late morning, and so when I returned, they had knocked everything out.
Before I left, I made a movie before I left of this tearout process, and you can use the player at left to watch it.
March 29, 2005
Today there is going to be a lot going on, including much of the granite installation, so let's get started:
Here, all of the tearout and teardown has been done. The old cooktop has been removed, because the granite will be taking its place. But the other appliances have not yet been taken out, although Steve is working right now on disconnecting the plumbing for the dishwasher, which will be the first appliance replaced. All the cabinet and drawer fronts have been taken off, and Steve and Richard are taking most of them off-site to refinish them. All the old tile has been taken off the walls, to be replaced with new marble squares. We still have the old ceiling light fixture, but that will be changed towards the end of the project. Finally, you'll note that the old raised countertop has been removed, and Steve has already rebuilt one side of the pony wall to make it straight.
With some help, Richard and Steve are removing the old dishwasher. It turned out that it was on its last legs; there were some rusted parts underneath and in back and, in not too long a time, it probably would have begun to leak. It had not been properly attached originally, and there had also been some movement of the unit that affected its noise level.
At left you can see that the first element of the new granite countertop has been installed- this being the small section to the left of the refrigerator. While they do an excellent job of getting the countertops straight and level, tiny imperfections will be covered by the edges of the tiles used for the backsplash. In this view, you can also see that the wall behind the refrigerator has been cut out so that, eventually, the fridge will be able to move back about six inches, freeing up that much more space in the kitchen.
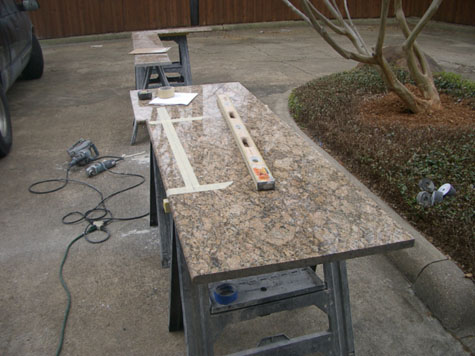
The granite guys are doing most of their work outside, behind the garage, as shown at right. This is the slab of granite that will become the counter over the dishwasher, past the sink and to the wall. I learned a bit about granite installations. For one thing, there is no way to cut one continuous piece for an L-shaped counter like mine. It COULD be done, if you were willing to pay for and then waste an incredible amount of the granite slab, but then you'd run the continual risk of the piece breaking. Indeed, the granite guys don't guarantee that they can keep from damaging pieces beyond a certain size. So, in most installations, there is going to be a seam somewhere. I was told that diagonal seams are the most noticeable and the hardest to install properly; there is also a tendency for the bullnose edge to fracture at the seam. So, for that reason, corners like mine will almost always have the seam a few inches away from the corner, one way or the other. In my case, the position of the sink dictated that the seam should be "around the corner" and down a couple of inches. Had it been alongside the sink, there would have been danger of fracture, since the strip would have been so small alongside the undermount sink.
|
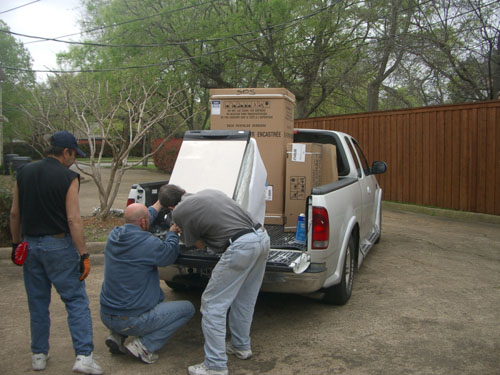
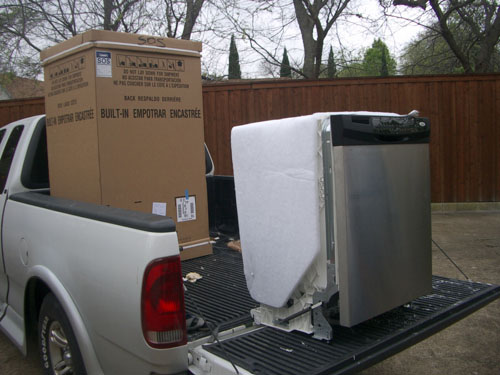
Richard had gone to Lowe's to pick up the new appliances. Right now, they have unboxed the new dishwasher and are looking at the connections to plan its installation under the sink section of granite. I think they are going to put it in place and then put the new granite on top of it. The other boxes contain the ceramic cooktop and the new double oven. I did not replace the refrigerator, but when mine starts to need repairs I will replace it with a matching stainless steel front model. |
|
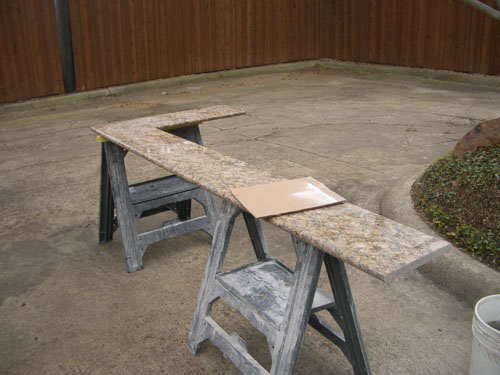
Here is the piece of granite that will become the top of the raised counter between the kitchen and the breakfast area. The granite folks said that this was the most difficult piece to do because it is so long and thin. It was also right at the limits of what they can do without having to have a seam. All the edge work is done at the granite yard, so that all that is usually needed on site is to polish the edges of any areas that are cut on site, such as the sink opening, in my case. |
|
They've taken the cooktop inside so that they can open it up and get out the template that will tell them how big an opening to cut, and so that they can figure out where the opening should be. The dishwasher is all ready to be installed. |
|
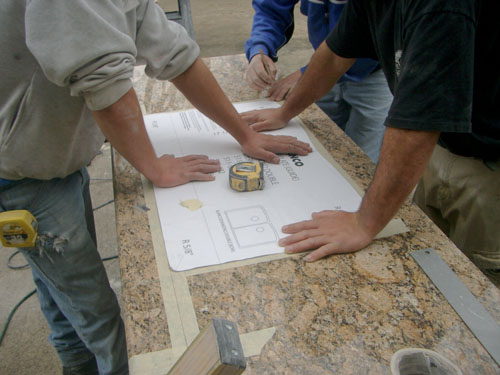
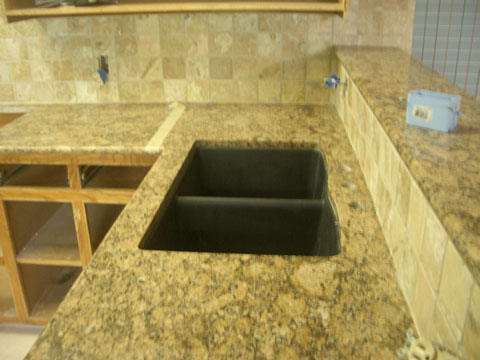
The sink came with a template, and here the granite guys have laid it on the solid granite countertop. Steve did the measurements inside; then they transfer those measurements outside to place the template. Once the template is in place and secured, then the crew mark the outside edge. The marks are transfered to a special tape that has been affixed to the granite itself. The tape not only holds the mark for them to cut by, but it also serves to pretty much eliminate the possibility of chipping as the internal cuts are made. |
The template marks have been made, and now the granite crew must carefully cut out an interior section of the granite slab. This is careful work, although even with all the care they took, when the final installation was made the cutout for the sink was slightly imprecise (although not enough to really notice. One of the crew must continually pour water on the saw as it is cutting. Otherwise, both the saw and granite will get very hot and, when they do, the chances for chipping increase.
|
Now that the opening has been cut, one of the crew members does the polishing and curving of the edges that will be at the top of the sink. They have a special polishing/grinding tool for this that will put the gentle curve at the exposed edges. Once again, this seems to be work that takes a great deal of care. |
|
They have brought in the sink counter that they have just cut. It has been laid in place and Steve and Richard are checking the placement of the undermount sink to ensure that it will be able to go in properly. As you can see, the top granite piece on the raised counter has already been installed. |
|
Here is another view of the prep work being done prior to the installation of the undermount sink. |
|
Richard is working on the electrical connections for the microwave. It will be installed above the cooktop. There was already a connection for the old vent hood, but he and Steve are upgrading the circuit to also allow for the undercabinet lighting. |
|
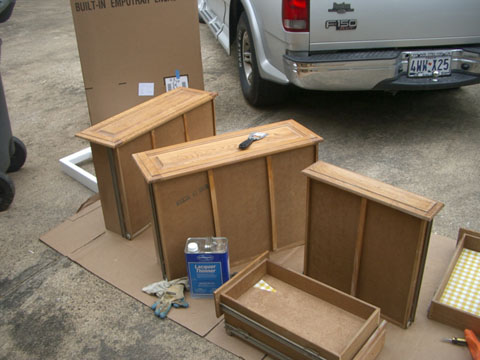
As I said, Steve has taken most of the cabinet fronts off site to refinish them, and here he has brought back some of the drawers that have been completed. He is going to use these to ensure that the weight of the granite countertop has not caused a change in the size of the openings for these drawers; the rails must still be the same height and distance apart. The lower cabinet doors don't matter nearly so much. |
|
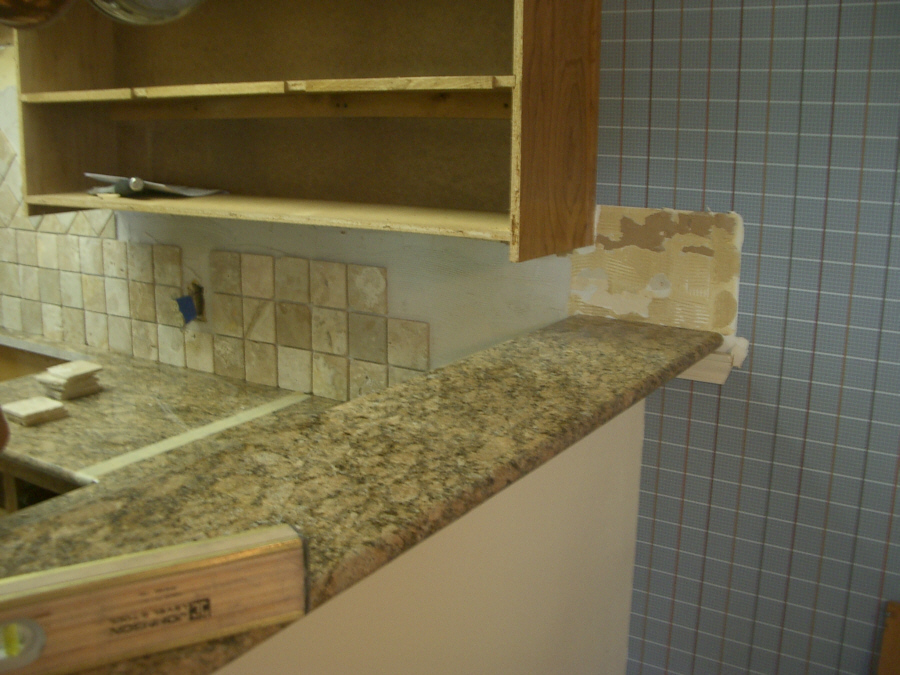
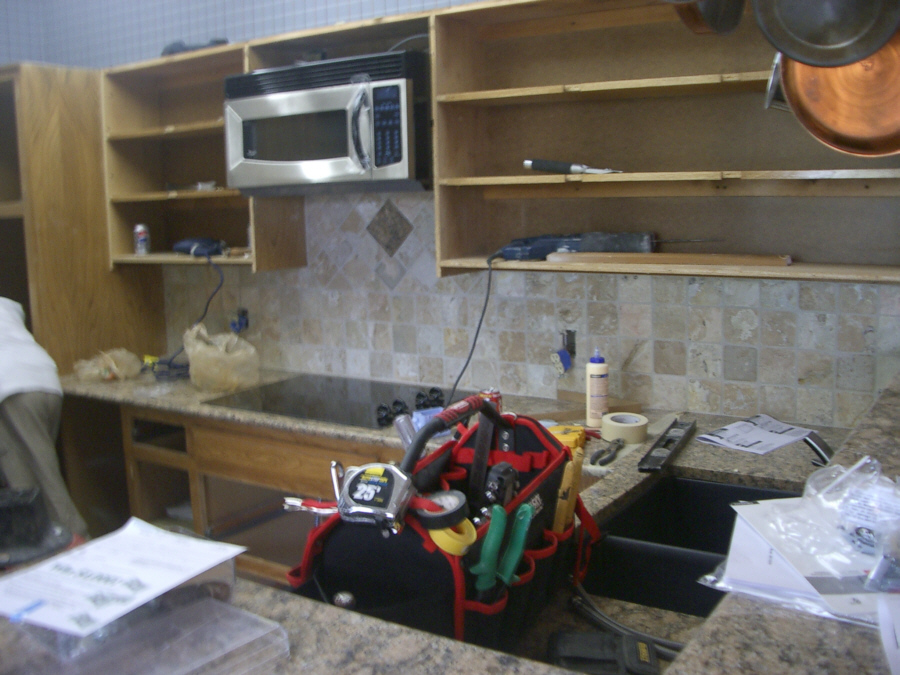
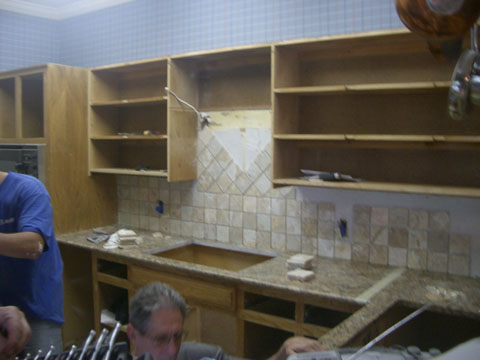
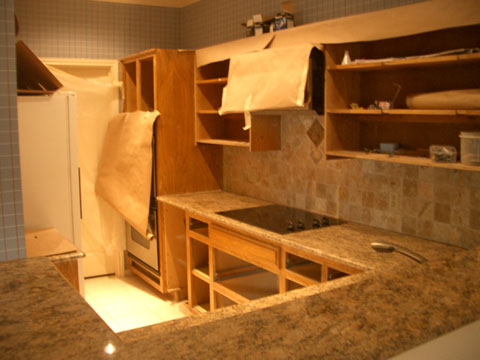
The last piece of the granite countertop has been laid; it already has a space for the ceramic cooktop. The tumbled marble backsplash is almost complete- save for the last row underneath the cabinets, the tiles for which have to be cut to fit. As a design element, the squares above the cooktop will run diagonally; this was suggested by the tile designer and I like the way it looks. The crew will also inset a square made of the countertop material to add another design touch. I will probably mount my spice rack here. |
We ran into a small problem at the wall end of the raised counter. Previously, the ceramic tiles on the wall had covered the area that you can see is not wallpapered. We had to figure out the best way to deal with this. I did have some extra wallpaper, but it would have been difficult (and obvious) if we tried to cut a piece to fit precisely, matching up the pattern, and then cutting it to fit around the raised granite countertop. It would have been almost impossible not to notice the seam. What we actually decided to do was to extend the tumbled marble to essentially cover this unwallpapered area. The tile guy assured us that he could round the corners of the tiles to make it look as if the tile job was planned that way in the first place.
Here is a detailed look at the tilework above the cooktop. He doesn't need to go much higher than the highest tiles you see here, because the microwave will cover them.
Here is the far end of the cooktop granite slab. I was pretty amazed that they had cut the piece so precisely and it fit just perfectly along the oven wall. The grout line along that wood wall was even smaller than a normal one, they were so precise. Steve has not removed the old oven and microwave yet, but that will happen soon.
Finally, today, Steve and Richard brought in the new dishwasher and they have installed it under the counter. They are preparing for the installation of the undermount sink. Only when the sink is installed can they put in the the disposal, and only when that is done can they hook up the plumbing connections to the dishwasher.
March 30, 2005
I'll start off today taking a few pictures before the guys get here, and then maybe some more as they are working.
|
Here is the installed sink. It was clamped up until yesterday, but now it is "hanging" under the countertop. Even when full of water, the adhesive that holds it to the underside of the counter will strong enough to hold them in place. The piece of masking tape is covering the seam between the two pieces of countertop. It will be removed and the countertop sanded as needed. |
|
Here is the long piece of granite countertop. The hole has been cut for the cooktop. Notice the accent piece of granite that has been put into the design of the tumbled marble squares that serve as the backsplash. All the cabinet fronts are being refinished and cleaned. |
The cutout for the fridge is done, but the plumbing has to be finished, some insulation installed and a frame put around the new opening, so the fridge has not been pushed back into place yet.
Some of the sink fixtures are laying on the counter. Richard and Steve should arrive any time now to begin the installation of the appliances, which are sitting in the garage.
It's two hours later now, and Steve and Richard have made some progress. The cooktop has been laid into its opening and has been grouted. The microwave has been attached to the wall and the electrical conduit for it and the cooktop have been run down to the lower cabinets.
|
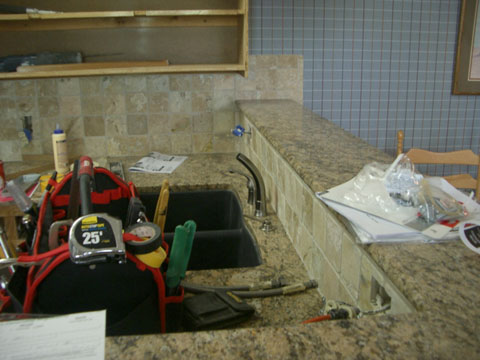
Steve has also done some work to install the sink fixtures, although all he's done has been to put them in place so he can see how the plumbing has to be hooked up. |
|
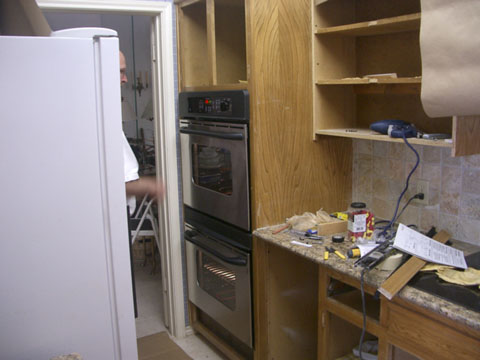
I have returned from seeing my Mom for lunch, and I've found that the double ovens are in and that Steve and Richard are in the process of hooking up the electrical for them. |
March 31, 2005
The major appliances have been installed, and now Steve and Richard are working on the lighting and plumbing.
|
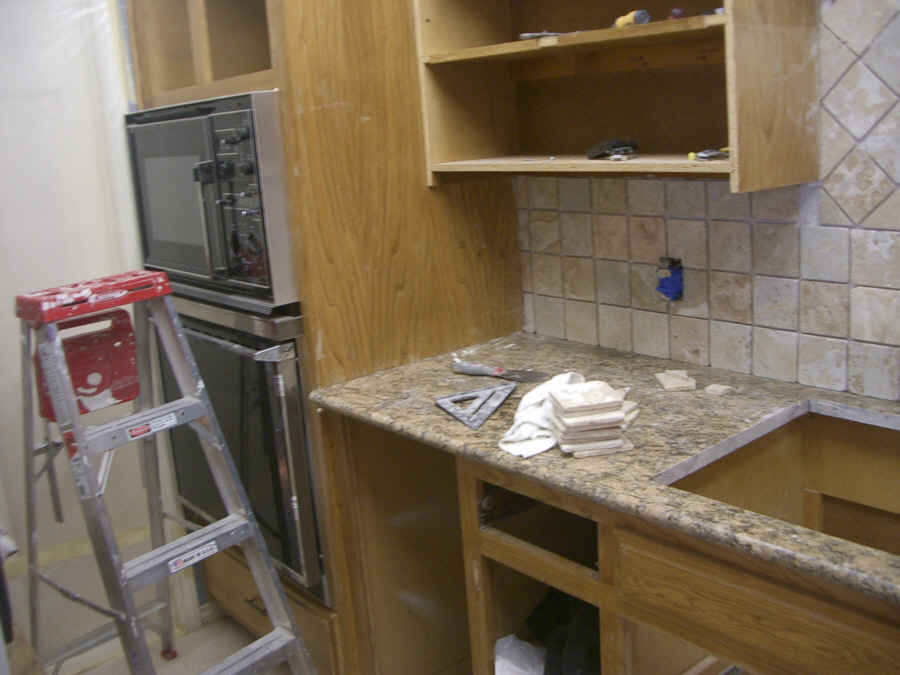
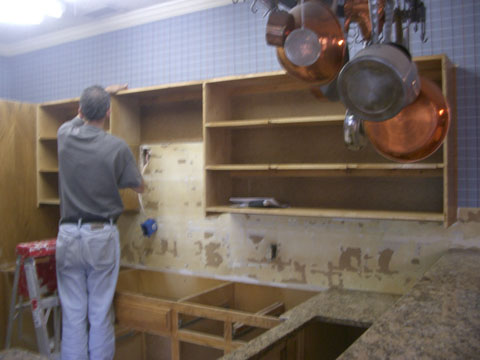
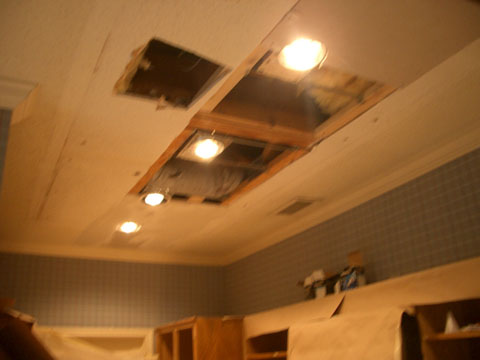
Here you can see that the ovens, cooktop and microwave have been put in, but that none of the cabinet fronts are in place. They are all being refinished. But the undersides of the cabinets and the underside of the toespace near the floor are ready for the lighting to be installed. I am running some errands to Meletio Lighting to find just the right fixtures. |
|
This is not a good picture; Steve is working on the can lights in the ceiling that will replace the large flourescent fixture that used to be there. |
The new sink has been undermounted to the counter, and the adhesives are set enough for it to hold itself up without being clamped. Steve has installed the fixtures, but they are not hooked up yet.
You can see that the dishwasher is in place, but the plumbing for it has not been hooked up yet. Steve has to do the sink fixtures, the disposal and the dishwasher, and you can see the plumbing partially done under the sink.
April 4, 2005
The project is nearing completion, and all the counters are in, the backsplashes are finished and the appliances are installed. Some of the cabinet fronts still have to be finished and installed, and the enclosure for the refrigerator needs some framing. I could actually use the kitchen, I suppose, but I'm in no particular hurry.
April 19, 2005
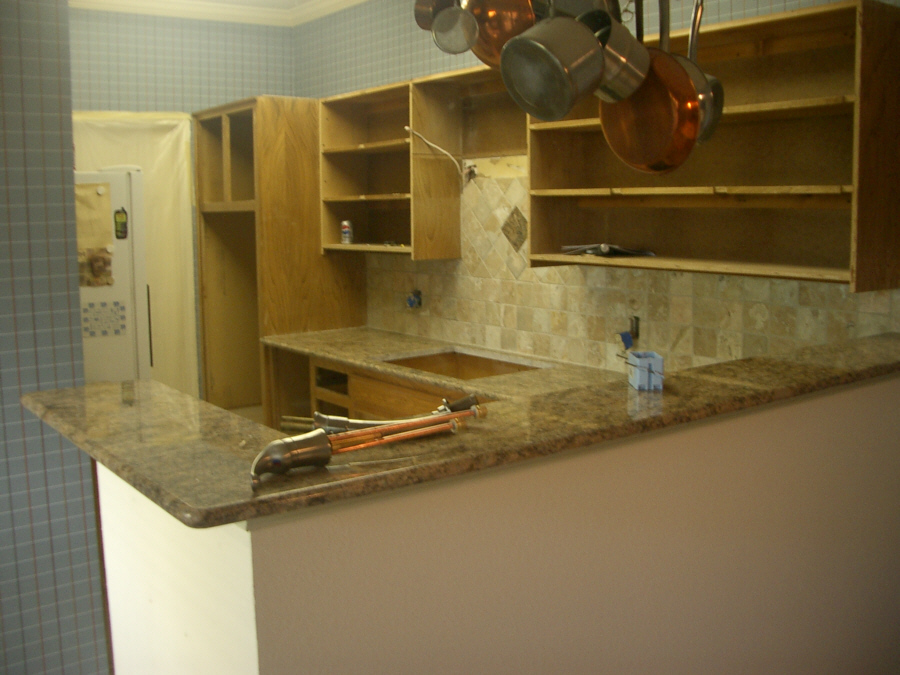
The project is coming to an end. There is still some ceiling work to do, but the counter, cabinets and appliances are basically done, and I've been able to put things in their places. I am going to take a more extensive set of pictures next week, but below is a thumbnail for a picture of how the new kitchen looks now. To view the full-size picture, just click on the thumbnail:
Here is a view of the new kitchen looking into it across the raised counter from the breakfast area.
April 25, 2005
Well, it has been quite a project, this kitchen renovation, but I think the results have been well worth it. I am very happy with the way things turned out. It will be a pleasure to not have to deal with the tile counters and the shallow sink. I like the glass cooktop much better than the old burners, and it is nice to have an updated microwave and electronically-controlled ovens. Recessing the refrigerator has given me more room in the kitchen, and the lighting effects have added an elegant touch. Below are some of the pictures and movies I made of the finished project. Clicking on the small thumbnails will open up full-size pictures.
|
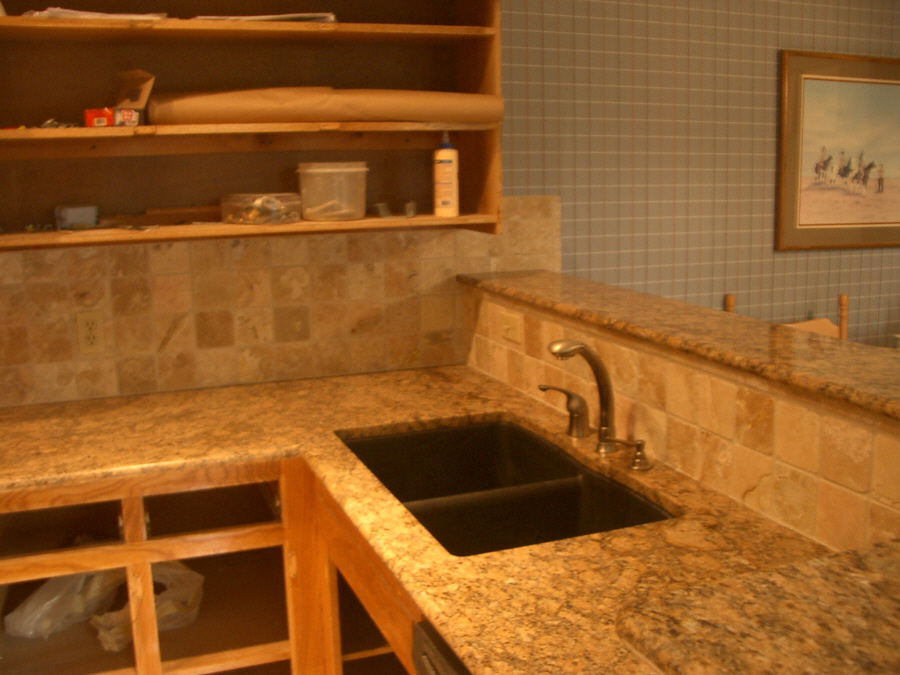
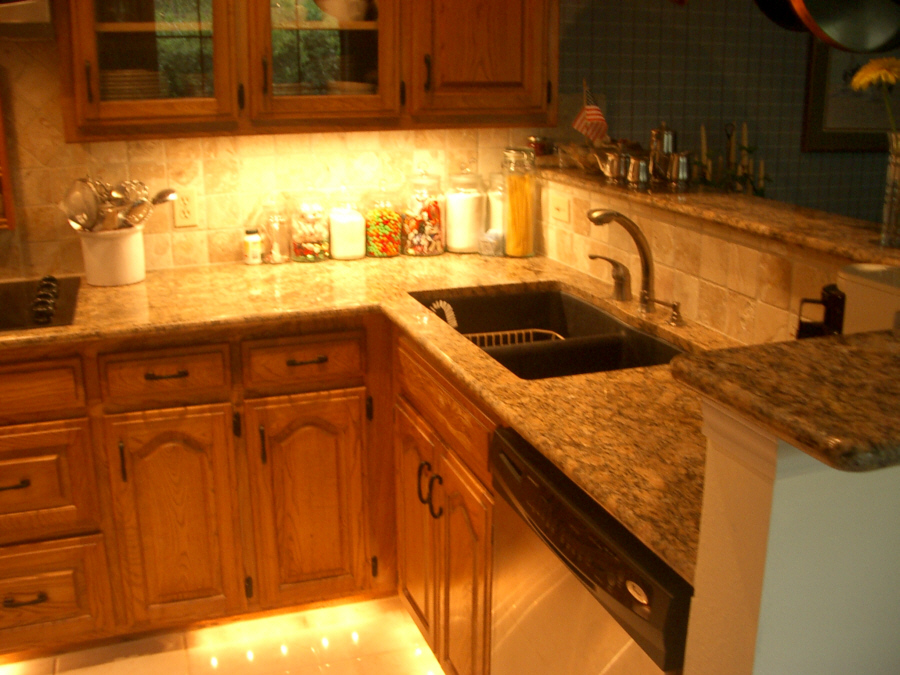
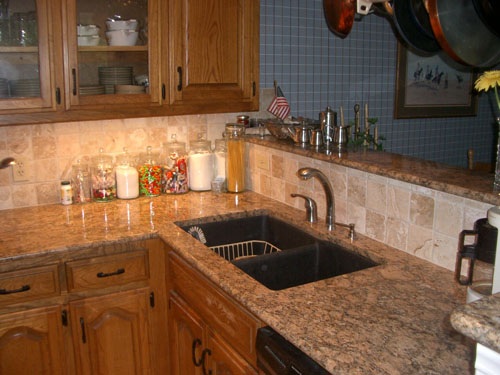
This is the new kitchen sink and the counter surrounding it. The sink is an undermount model, which means that there is no "lip" to catch stuff, and no caulking to worry about. When you wipe down the counter, anything on it goes right into the sink. The sink is deeper than it used to be, making it easier to wash large items. You can also see the new dishwasher here, and some of the undercabinet lighting. There are new fixtures, too. |
|
Here is the new counter along the long wall. I've gotten a glass ceramic cooktop, eliminating burners and burner trays. A couple of the cabinets now have glass inserts in the doors, opening up the kitchen quite a bit. Above the cooktop is the new microwave; it is an up-to-date, digital model, replacing the old analog one that came with the condo. The undercabinet lighting really adds a lot to the ambience of the kitchen. |
 |
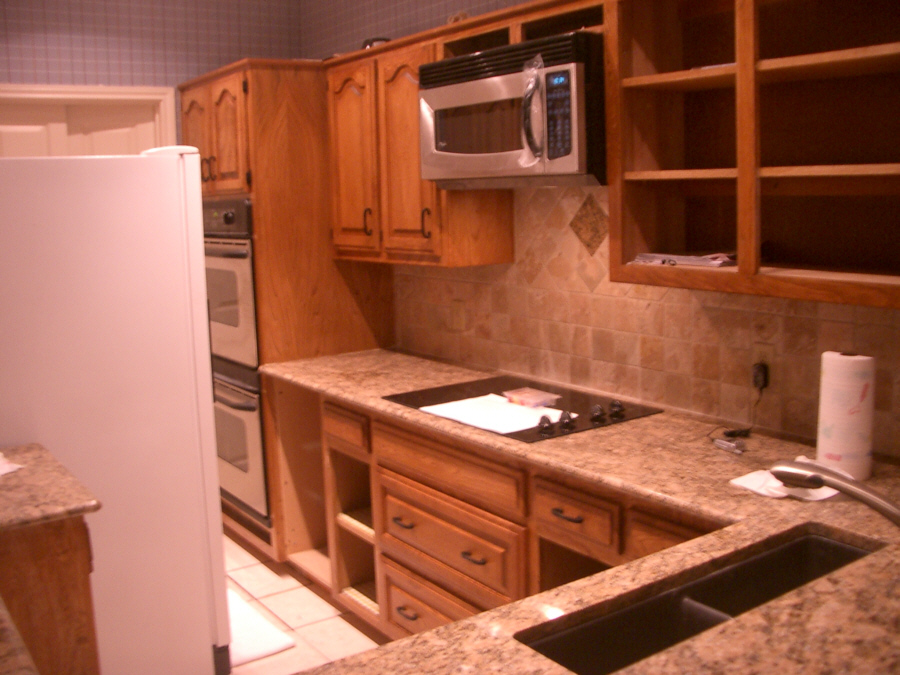
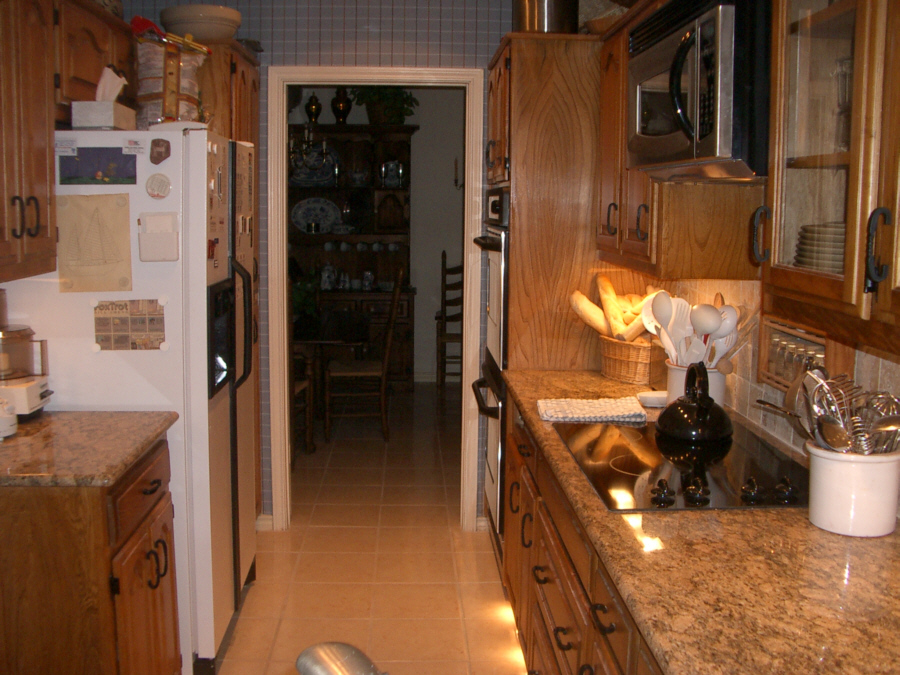
Here is a view of the kitchen looking towards the dining room. On the left, the refrigerator has been recessed about eight inches into the wall, opening up that much more space in the kitchen itself. The pantry is still at the far end on the left, and on the right, in the space where the old microwave and oven used to be, there is now a double oven, which will make cooking large meals less of a logistical chore.
 |
This shot of the sink area was designed to give you another view of the effect caused by the new undercabinet lighting, and also to show you the new "toe lighting" that has been installed at floor level underneath the cabinets. It gives the illusion that the cabinets are floating above the floor.
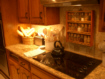 |
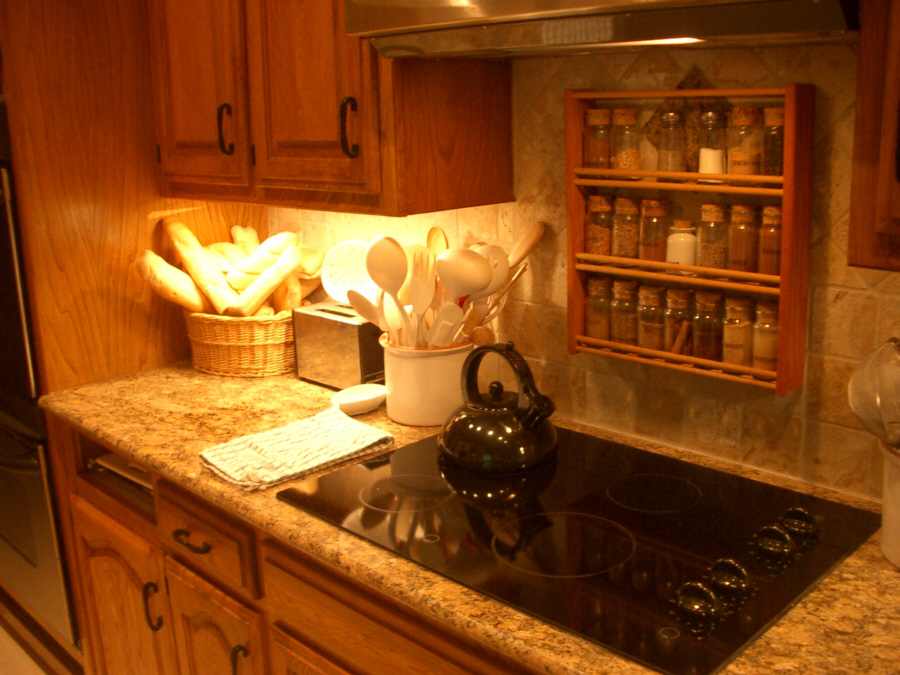
Here is the detail of the new cooktop. Instead of a solid granite backsplash, I have chosen to put tumbled marble squares on the walls underneath cabinets. It is a really nice effect, and, although there is grout involved, it stays clean, since nothing is ever put "on" it, as used to happen on the countertop itself. I have mounted the spice rack above the cooktop. The granite folks cut a diamond-shaped piece of the granite and inset it in the wall above the cooktop, carrying the granite color onto the walls. I've got everything pretty much arranged now, and love the way everything looks.
|
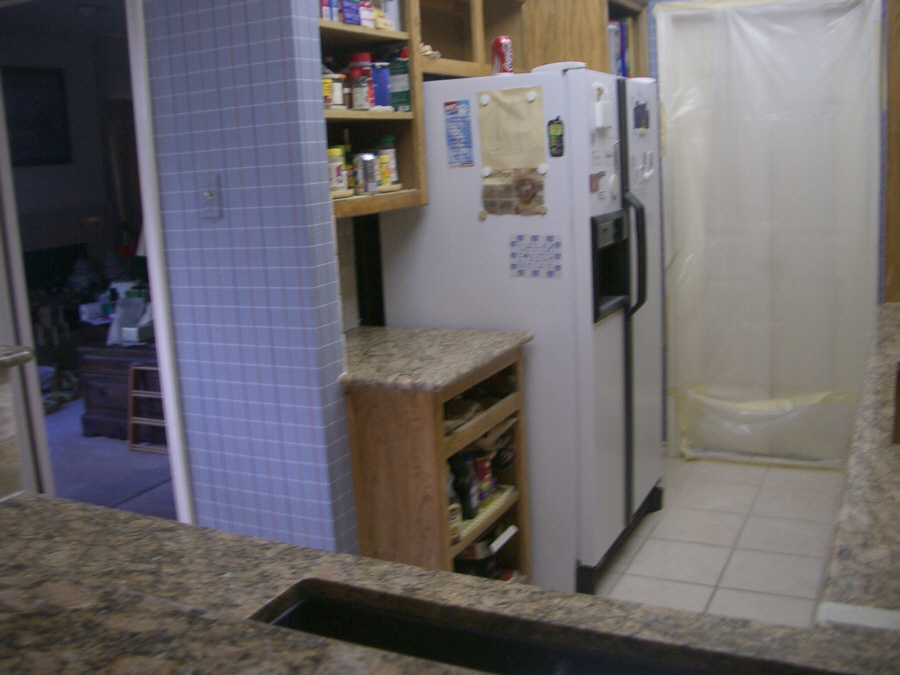
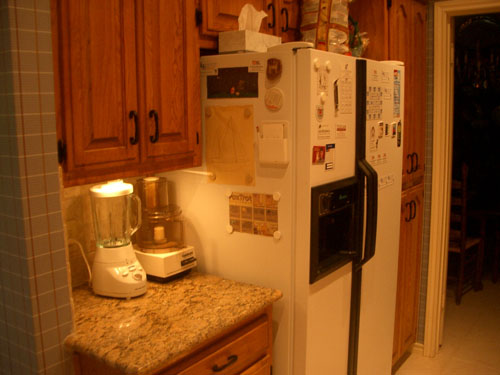
Of course we did the small counter next to the refrigerator the same way as all the others, and it even has it's own little undercabinet light. You can see clearly here that the refrigerator is now just about flush with the counter, since it has been moved back about eight inches into a cutout that the fellows made in the wall behind it. |
|
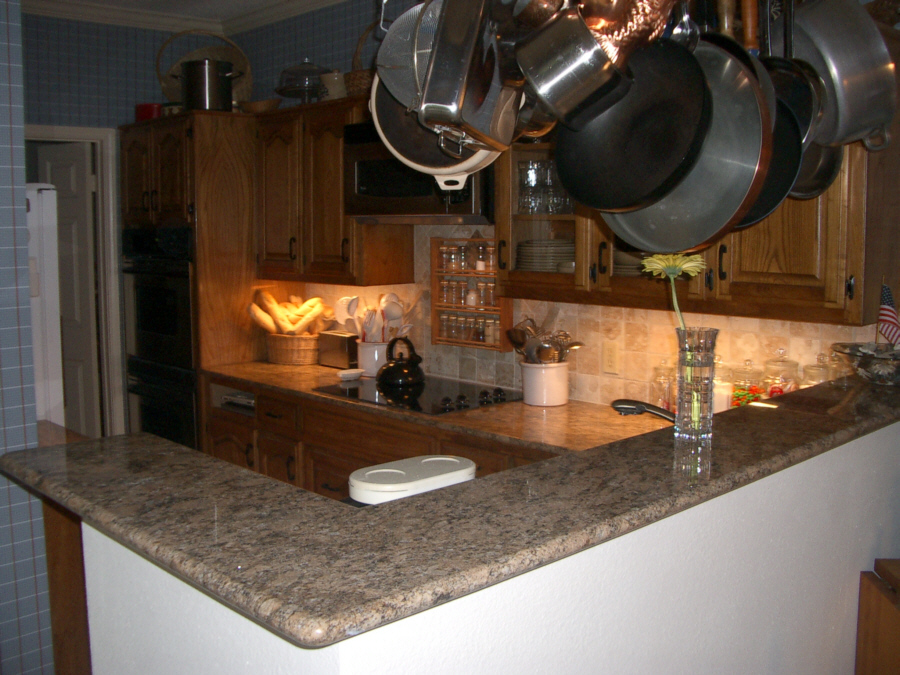
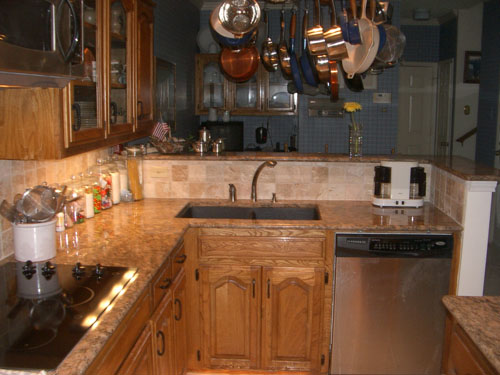
Finally, here is a shot of the kitchen looking from the dining room towards the breakfast area. All the cabinets have been refinished, and new black hardware has been installed- to match the black accents of the new appliances and the sink. The potrack was moved back towards the eating area about eighteen inches so that some new recessed ceiling lights could be installed to shine down on the sink itself. Notice that we left the raised counter; at one point, I thought I might get rid of it. But I realized that it provides a good way to hide some of the stuff that sits on the counter. So we just retopped it with granite and used the tumbled marble below it. |
Kitchen Tour: Eating area to sink/counter.
(Mouseover Image if Video Controls Not Visible)
|
|
Kitchen Tour: Sink/counter and dishwasher.
(Mouseover Image if Video Controls Not Visible)
|
Kitchen Tour: New cabinets and lighting.
(Mouseover Image if Video Controls Not Visible)
|
|
Kitchen Tour: Cooktop, floor lighting and new ovens.
(Mouseover Image if Video Controls Not Visible)
|
Kitchen Tour: Refrigerator and adjacent counter.
(Mouseover Image if Video Controls Not Visible)
|
|
Kitchen Tour: Dining room entrance to breakfast area.
(Mouseover Image if Video Controls Not Visible)
|
You can use the links below to continue to another photo album page.
|
Return to Index for 2005 |