|
September 17, 2013: Glamis Castle and Aberdeen, Scotland |
|
September 15, 2013: Sightseeing in Edinburgh (Day 2) |
|
Return to the Index for Our British Isles Trip |
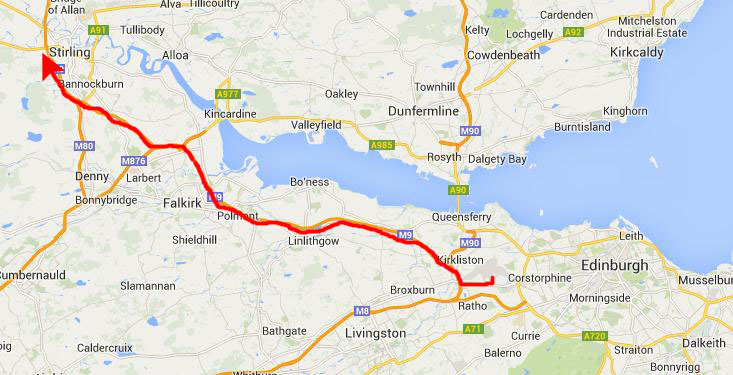
Today we are going to pick up the van we are going to use for the rest of our time in Scotland and England, and as soon as we do that, we are going to head to Stirling, Scotland, to visit the town, see Stirling Castle and visit the Wallace Monument.
Driving to Stirling, Scotland
|
The scenery along the was was unremarkable; the countryside was green rolling hills with lots of farms and lots of sheep. The motorway was much like an American interstate (save for our being on the wrong side of the highway) until we found the exit for Stirling. When we got off there, we took a secondary road through the countryside heading into the city. As we drove around the south side of the city, we got our first views of Stirling Castle and the Wallace Monument.
Although we didn't know it at the time, our route along the south edge of the city took us by the remains of a huge royal garden, an area that can only be appreciated by viewing it from high up in the Castle.
|
We followed the signs for Stirling Castle, and this brought us to a street where we headed back northwest. When we got close to the Castle, we looked for a parking space on the street (not realizing at the time that there was plenty of parking right at the Castle that would have been a bit cheaper and much more convenient than the space we found.
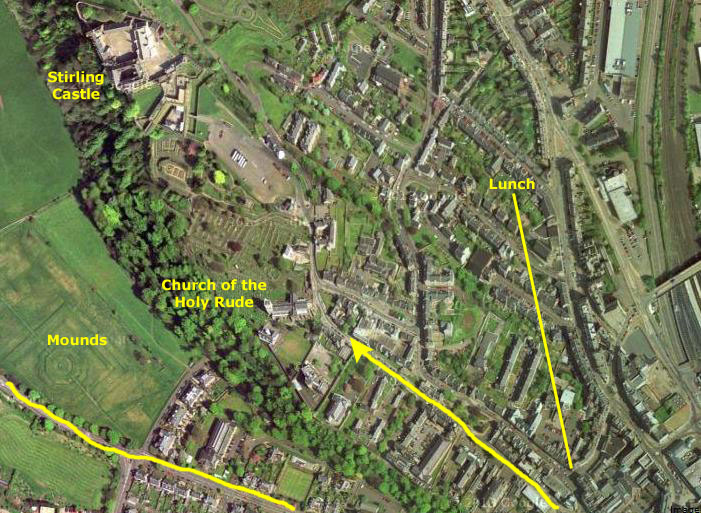
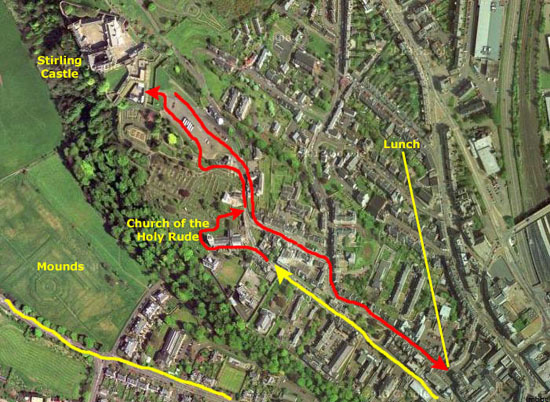
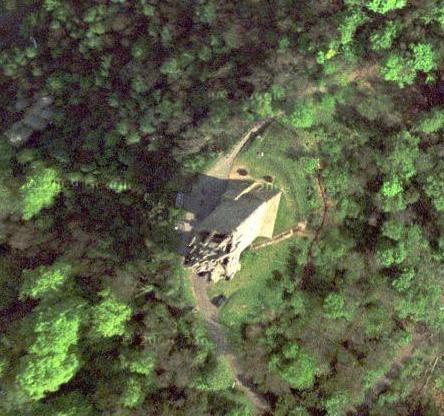
On this aerial view, I have marked the location of three locations we'd visit- the Church of the Holy Rude (our first stop), Stirling Castle (our second stop and where we spent the majority of our time) and the spot downtown where we stopped to have lunch, walking down there from the Castle.
Our first stop was the church (which we hadn't actually known was there).
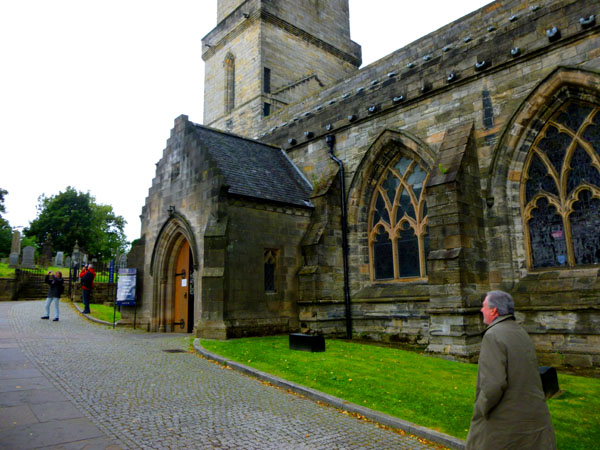
The Church of the Holy Rude
|
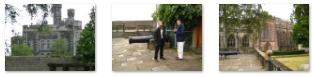
Below are clickable thumbnails for three additional pictures of the outside of the church:
 |
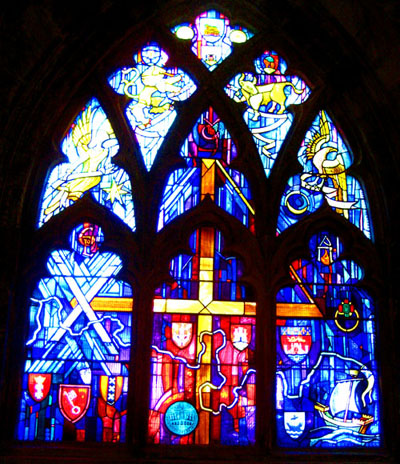
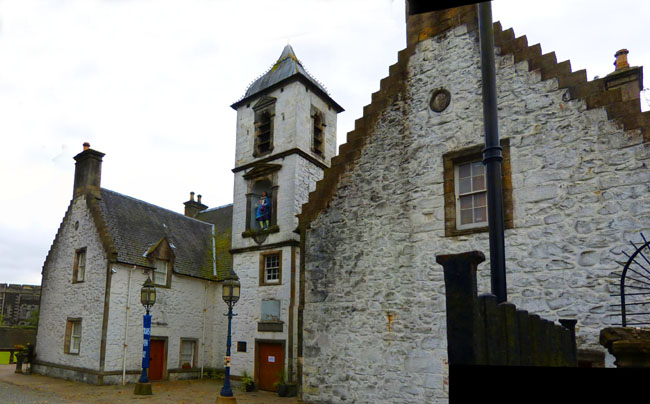
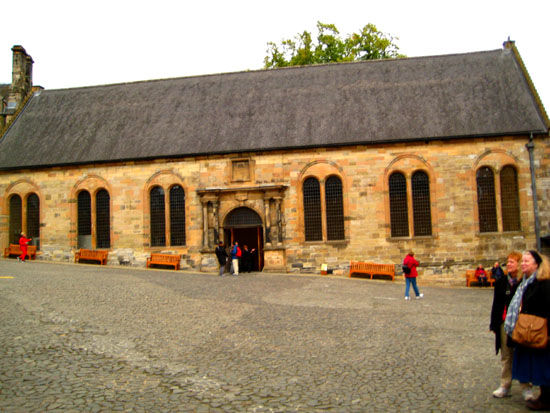
With its original oak roof beams, this is one of Scotland's finest medieval churches. Tradition says that King James IV may have helped masons build the later eastern end during the early 16th century. Bullet marks on the tower may date from a siege of the castle by Cromwell's troops in 1651.
Like many of the other churches we visited on our trip to England, there were a number of crypts and burial spots in the walls in in the floor. Most of them had markers like this one (which reminded me of the PBS series "Blackadder"). The nave also had a small pipe organ.
|
|
|
To view the slideshow, just click on the image at right and I will open the slideshow in a new window. In the slideshow, you can use the little arrows in the lower corners of each image to move from one to the next, and the index numbers in the upper left of each image will tell you where you are in the series. When you are finished looking at the pictures, just close the popup window.
King James VI was crowned King of Scots on 29 July 1567 in the church; Adam Bothwell, Bishop of Orkney, performed the ceremony and John Knox preached a sermon. For the first time, the rites were Protestant and not, as at James' baptism, Roman Catholic; "the whole ceremony was made and done" in the Scottish tongue and not Latin. The Church of the Holy Rude, Gloucester Abbey (now Cathedral) and Westminster Abbey the only churches in Britain still in use to this day that have been the sites of coronations.
|
|
To view the slideshow, just click on the image at right and I will open the slideshow in a new window. In the slideshow, you can use the little arrows in the lower corners of each image to move from one to the next, and the index numbers in the upper left of each image will tell you where you are in the series. When you are finished looking at the pictures, just close the popup window.
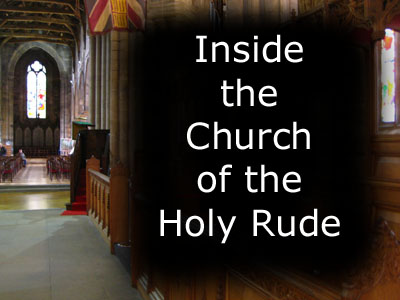
The inside of the church was quite interesting; we were to see the interiors of many beautiful churches and cathedrals on our trip. But Stirling Castle was beckoning to us, so we left the church building and walked around the back of the church by the large graveyard to another exit back to the street. There are some clickable thumbnails below for some other pictures taken around the outside of the Church of the Holy Rude:
 |
There was a large graveyard surrounding the church and some of the adjacent properties, and we'll look at it in a moment. But for now, we left the church grounds and headed up the hill.
|
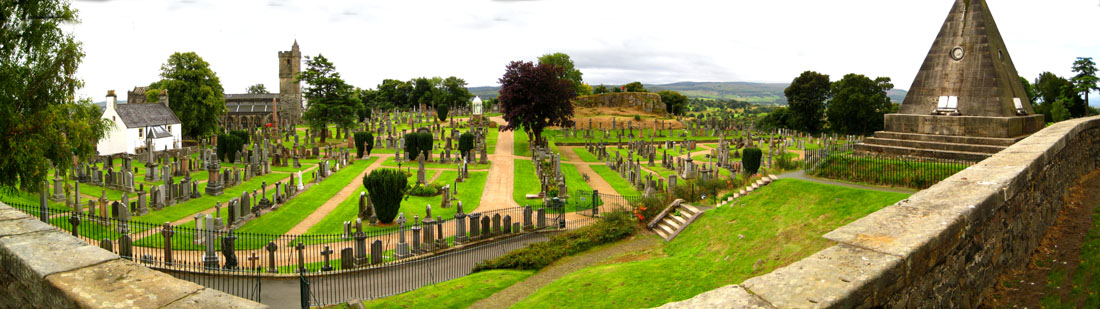
At the top of the street, we found a stairway that led up beside another building; that building had a restaurant and a small inn. The stairway led up to the level of the large parking lot for Stirling Castle (and we saw that we could have driven up here to park) and an overlook from which we could see all of the extensive graveyard that lay behind the church and south of the castle. Here is a panoramic view that I made from four different pictures:
 |
And below are clickable thumbnails for some of the other pictures we took earlier in the graveyard and from this overlook:
 |
From here, we headed over to the entrance to Stirling Castle.
Stirling Castle
|
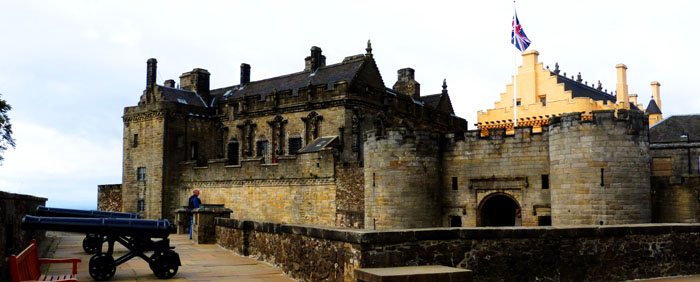
Under the early Stewart kings Robert II (Robert Stewart, reigned 1371�1390) and Robert III (reigned 1390�1406), the earliest surviving parts of the castle- the north and south gates- were built. Fifty years of royal intrigue led to the reign of James III (1460�1488) who was born in the castle and who later undertook works to the gardens and the chapel royal. Almost all the present buildings in the castle were constructed between 1490 and 1600, when Stirling was developed as a principal royal centre by the Stewart kings James IV, James V and James VI. The architecture of these new buildings shows an eclectic mix of English, French and German influences, reflecting the international ambitions of the Stewart dynasty.
|
Queen Mary's son, James VI, was baptized in Stirling Castle and crowned in the nearby Church of the Holy Rude. More years of intrigue and conflict followed, during which James' first child, Henry, was born in the castle in 1594, and the present Chapel Royal was constructed for his baptism. Upon the Union of the Crowns in 1603, James VI succeeded as King of England and the royal family left for London. With the King gone, Stirling's role as a royal residence declined, and it became principally a military centre. Following the execution of Charles I, the Scots crowned his son Charles II, and he became the last reigning monarch to stay at Stirling. He was eventually defeated by the forces of Oliver Cromwell.
After The Restoration of Charles II, the castle's military role became increasingly important, continuing through the uprisings and conflicts of the Jacobite Rebellion in the 1750s. From 1800 until 1964 the Castle was run as a barracks and recruiting depot for the Argyll and Sutherland Highlanders. The Great Hallbecame an accommodation block; the Chapel Royal became a lecture theatre and dining hall; the King's Old Building became an infirmary; and the Royal Palace became the Officer's Mess. Since 1964, when the military use ended, the buildings have been undergoing a restoration, a program completed in 2011. Stirling Castle remains the headquarters of the Argyll and Sutherland Highlanders, although the regiment is no longer garrisoned there, and their museum is located adjacent to the Royal Palace.
|
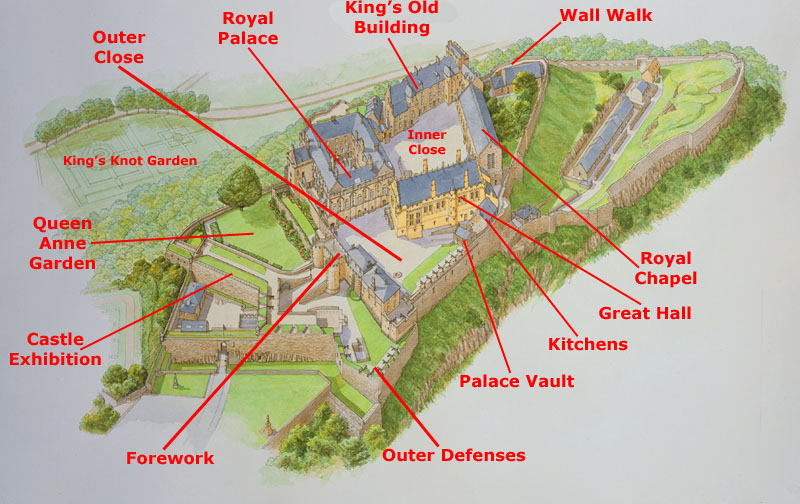
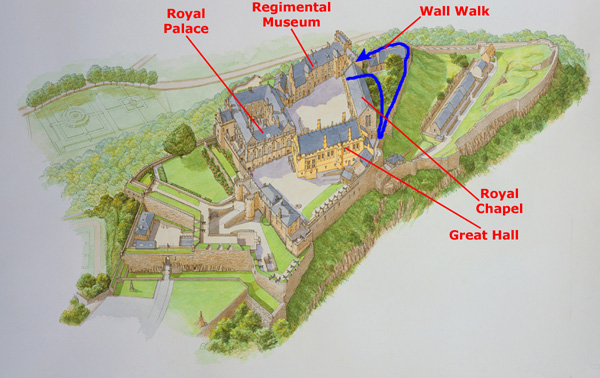
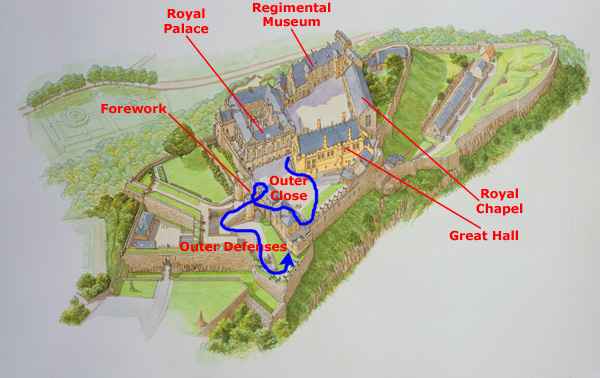
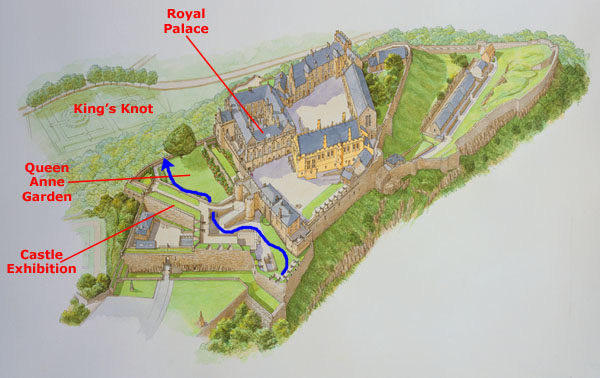
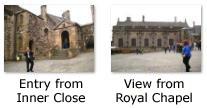
At left is a diagram of Stirling Castle, taken from the Castle's own website, which I have enlarged and marked with the major features of the Castle complex. Most of the time we took to visit Stirling Castle was spent in the four buildings surrounding the Inner Close (courtyard)- the Royal Palace, the King's Old Building (Regimental Museum), the Royal Chapel and the Great Hall, and we went directly to these buildings first. So we'll look at their pictures first, each in its own section below.
While the other folks were in the museum, I went out to walk along the castle walls- the Wall Walk- and we'll look at those pictures next. After that, we visited the Queen Anne Garden, from which we could see the King's Knot Garden below, and we also went into the Castle Exhibition, and so we'll next look at the pictures taken in the Queen Anne garden and the exhibition.
Finally, as the rest of the group was getting ready to head out, I went back in to the Outer Close where I could look at the gun batteries, climb up on the Forework and have a look at the Outer Defenses and even descend into some of the underground rooms and lookout posts. The last few sections will cover those areas.
|
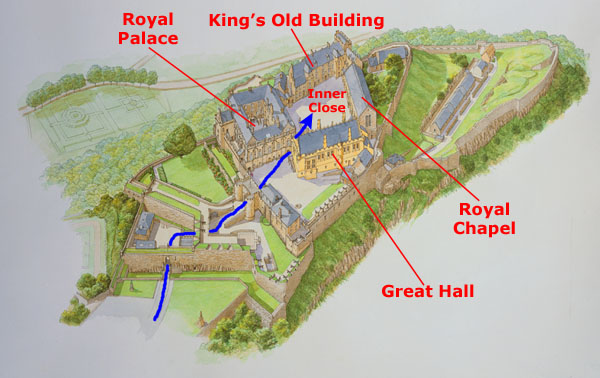
As we tour the Castle, you can return to the diagram or aerial view above to see where we are, but I will also provide you with little miniature versions of the diagram for each of the sections of our walk- the Inner Close and four main buildings, the Wall Walk, the Outer Close and the Queen Anne Garden.
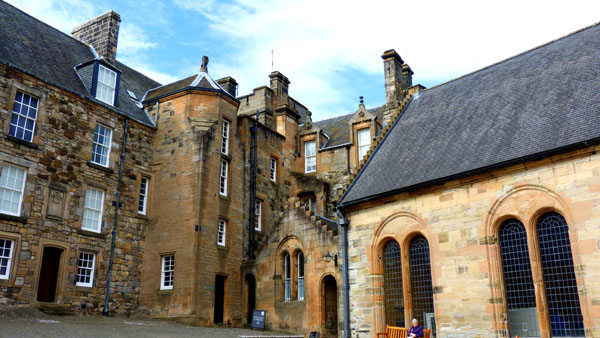
|
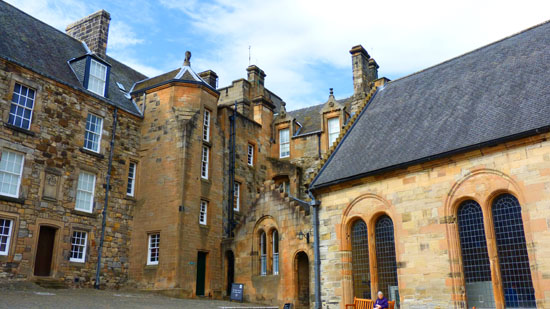
Before we tour the four main buildings off the Inner Close, you might want to see them in relation to each other. I stood with my back to the King's Old Building, and took a series of pictures of the close before me. In the resulting panorama, you can see a bit of the King's Old Building at the left and then, working around from left to right, the Royal Chapel, the Great Hall and the Royal Palace:
 |
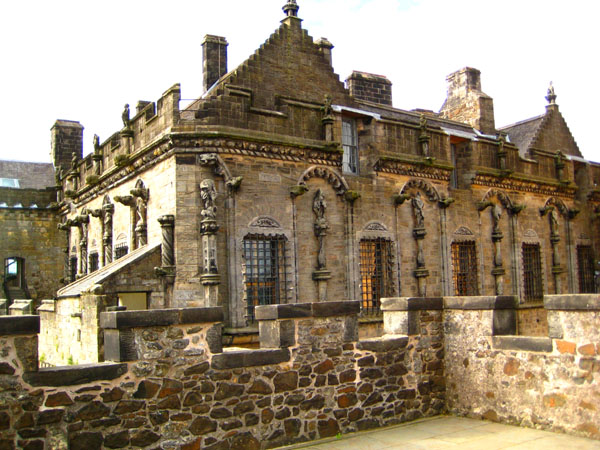
The Royal Palace
|
Below are clickable thumbnails for some other views of the outside of the Royal Palace:
 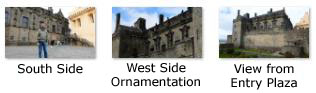 |
A $20 million project to recreate the grandeur of the Royal Palace resulted in its re-opening to the public in 2011. The work, which has taken a decade of research and craftsmanship, restored six royal apartments to how they would have looked in the 1540s, when this was the childhood home of Mary Queen of Scots. There is also an ongoing restoration of the seven hand-woven tapestries that originally graced the apartments.
|
In the Queen's Bedroom |
The Renaissance decoration continued inside, although little has survived the building's military use, excepting the carved stone fireplaces. Each of the different fireplaces, and we saw four or five of them, had a different colorful carving above it, although it didn't look as if the works were extremely old. You can see two other fireplaces, each with a different carved work above it here and here.
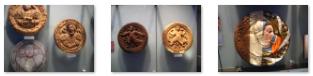
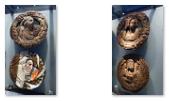
The ceiling of the King�s Presence Chamber was originally decorated with a series of carved oak portrait roundels known as the Stirling Heads, described as "among the finest examples of Scottish Renaissance wood-carving now extant." The carvings were taken down following a ceiling collapse in 1777. During the restoration that ended in 2011, painted replicas of these roundels were reinstalled in the presence chamber ceiling. Of an estimated 56 original heads, 38 survive.
|
Save for the Queen's bedchamber, the rooms in the Royal Palace were sparsely furnished (or not furnished at all). An explanatory sign indicated that the original furnishings have long since been lost or are in museums, and that the restoration trust is in the process of creating period-authentic replicas for the rooms. In some of the other rooms (each of which had a decorated fireplace) we found an opportunity to take some additional pictures, and there are clickable thumbnails for them below:
 |
Partway through the tour of the Royal Palace, I saw a hall that led to the outside and, although it wasn't on the tour path, I went to check it out anyway. The hall led to a balcony at the west end of the building; this balcony offered expansive views to the north, west and south.
|
|
I returned to the tour path, and it eventually led us out to the south side of the palace, down some outside stairs to another balcony on the building's south side, overlooking the Queen Anne Garden. From here were nice views of the garden, the Forework, the outer defenses and of Stirling, and you can use the clickable thumbnails below to see some of these views:
 |
The stairs at the east end of the balcony took us through the last few rooms of the palace, and then back out to the Inner Close.
The King's Old Building (Regimental Museum)
|
It was begun as a new residential range by James IV, and originally comprised an L-shaped building. The principal rooms were on the first floor, over cellars, and included two chambers with wide open views to the west, although the interiors have been much altered. The projecting stair tower (seen in the picture at left) has an octagonal upper section, which was copied for a second, later stair tower on the same building.
In 1855, the north end of the building burned down, and was rebuilt in a Baronial style. At the south-west end of the range is a linking building, once used as kitchens, which is on a different alignment to both the King's Old Building and the adjacent Royal Palace. It has been suggested that this is an earlier 15th-century structure, dating from the reign of James I. Excavations within this building in 1998 revealed burials, suggesting that this may have been the site of a church or chapel.
The building now houses the Regimental Museum for the Argyll & Sutherland Highlanders Regimental Museum, and a few of us spent some time wandering around its three floors, looking at the exhibits. There were old photographs (including one of members of the Regiment in India) and items of clothing and weapons carried by Regiment members- including this officer's uniform. There was also an actual item called the "91st Centerpiece." This ornate silver construction was purchased by the officers to commemorate the part taken by the Battalion in the South African War between 1899 and 1902. You can read more about this item on the display sign next to it here.
The Royal Chapel
The collegiate chapel established by James IV in 1501 lay between the King's Old Building and the Great Hall, but was further south than the present building. This was the chapel in which Queen Mary was crowned in 1543. However, when James VI's first son, Prince Henry was born in 1594, it was decided to rebuild the chapel as a suitable venue for the royal christening.
|
At the east end of the chapel is a simple altar in front of another set of tall windows, and the barrel vault ceiling is bordered by painted wall murals. There were also a number of interesting signs around the room, these signs detailing major elements in the history of the space, and you might want to read them. Their titles are below, and clicking on any title will bring up the sign for you to read:
We came out of the Royal Chapel and headed over to the last of the four buildings surrounding the Inner Close.
The Great Hall
|
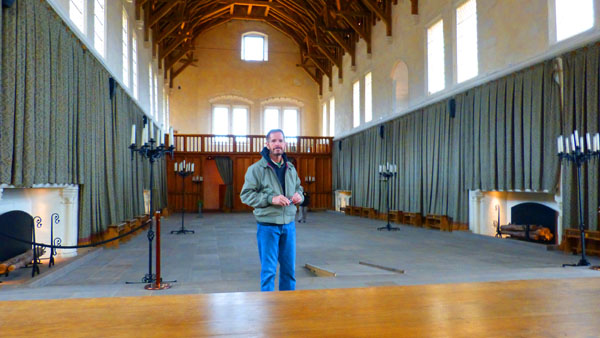
Described as "the grandest secular building erected in Scotland in the late Middle Ages", it represents the first example of Renaissance-influenced royal architecture in the country. It was worked on by a number of English craftsmen, and incorporates some English design ideas, being comparable to Edward IV's hall at Eltham Palace, built in the late 1470s. It includes Renaissance details, such as the intersecting tracery on the windows, within a conventional medieval plan. Inside are five fireplaces, and large side windows lighting the dais end, where the king (and his queen) would be seated. Its interior dimensions are 140 by 50 feet, making it the largest such hall in Scotland.
The original hammerbeam roof was removed in 1800, along with the decorative crenellated parapet, when the hall was subdivided to form barracks. Two floors and five cross-walls were inserted, and the windows were altered accordingly.
|
The Great Hall was the place where subjects could get close to their monarch, while James IV built the more private apartments opposite- in the King's Old Building. His son, James V, erected the Royal Palace for greater luxury and privacy, and to complete the square, James VI built the Royal Chapel for the baptism of his own first-born son.
The Great Hall was the last of the four major structures surrounding the Inner Close, but there was lots more to see at Stirling Castle.
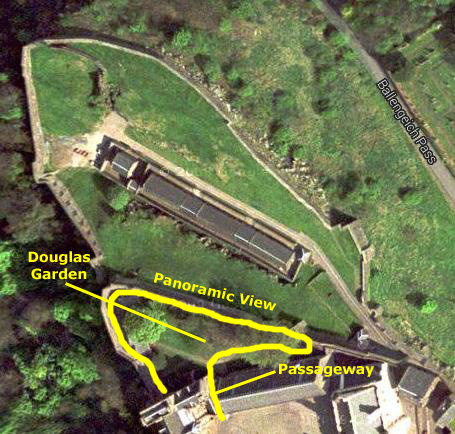
The Wall Walk
|
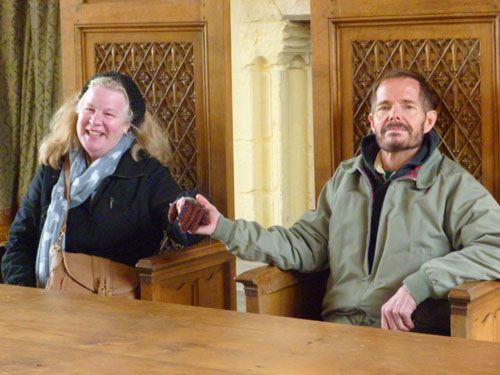
James II had raided the Douglas lands during the Earl's pilgrimage to Rome. Despite this, their relations seemed outwardly friendly. However, in early February 1452, a summons was brought to the Earl commanding him to attend the King at Stirling. There was abundant precedent for suspicion in a mandate of this nature, but, as if to allay it, the King's messenger also brought the Earl a safe-conduct given under the King's hand in council. When the Earl arrived, King James demanded the dissolution of a league into which Douglas had entered with the Earl of Crawford and others. Upon Douglas's refusal, the king murdered him by his own hand, stabbing him 26 times, and his body was thrown out of a window into the garden that once occupied this area. Here are Fred and Nancy standing on that very spot.
|
|
To view the slideshow, just click on the image at left and I will open the slideshow in a new window. In the slideshow, you can use the little arrows in the lower corners of each image to move from one to the next, and the index numbers in the upper left of each image will tell you where you are in the series. When you are finished looking at the pictures, just close the popup window.
While I was on the wall, I took a series of five pictures to capture the wall to my right, the entire panorama in front of me and the wall to my left. This took five separate shots, and I have combined them into the panorama below:
 |
When we were done on the north wall, we came down a small set of stairs, walked back past the north end of the King's Old Building and its outside staircase, and back through the passageway to the Inner Close.
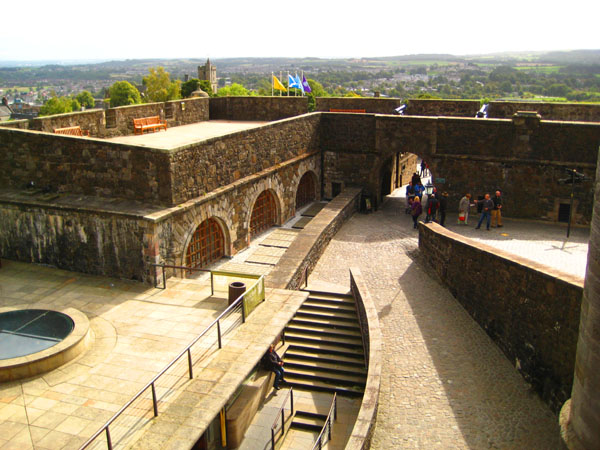
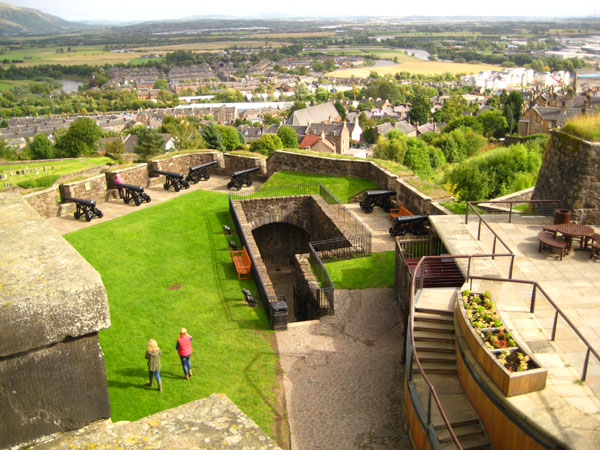
The Outer Close, Forework and Outer Defenses
|
Excavations in the 1920s ascertained the extent of the surviving rooms, and the vaults were reconstructed in 1929. The small building above the North Gate is traditionally said to have been a mint, known in Scots as the Cunzie Hoose or "coining house". From the southeast corner of the close, I was able to descend into some of these restored rooms. They were small and dark, as you can see here and here; the only light came from the two or three observation slits in some of the rooms.
Coming up from those rooms, I next took the set of stairs that led up to the top of the Forework.
|
The overall design of the Forework shows French influence, and has parallels with the forework erected at Linlithgow Palace. Like the Linlithgow structure, the Forework was probably intended more for show, evoking the "age of chivalry", than for defence, as it would have offered little protection against contemporary artillery. The entrance was via a central passage, flanked by two separate pedestrian passages; you can see those passages here in a picture that Fred took when we first entered the complex. This triple arrangement was unusual in its time, and Classical triumphal arches have been suggested as an influence.
The gatehouse was dismantled gradually, and was consolidated in its present form in 1810. At each end of the crenellated curtain wall was a rectangular tower. The west tower, known as the Prince's Tower, probably after Henry, Prince of Scotland, survives to its full height, and is now attached to the later palace. At the east end, the Elphinstone Tower contained a kitchen and possibly an officer's lodging. It was cut down to form a gun battery, probably in the early 18th century when the Outer Defences were rebuilt.
Coming down from the top of the turreted Forework gate, I went underneath where I'd been standing, through the central passage and out into the outer defenses.
The Outer Defences comprise artillery fortifications, and were built in their present form in the 18th century, although some parts, including the French Spur at the east end, date back to the regency of Mary of Guise in the 1550s. The French Spur was originally an ear-shaped bastion known as an orillon, and contained gun emplacements which protected the main spur. This projecting spur was fronted by an earth ramp called a talus, and was entered via a drawbridge over a ditch. Excavations in the 1970s showed that much of the original stonework remains within the 18th-century defences.
|
To the rear of the walls, chambers called casemates were built to strengthen the wall, and to provide gun emplacements. The French Spur was modified slightly to allow more cannons to be mounted. The buildings within Guardhouse Square date from the 19th century. Outside the castle is the early 19th-century Esplanade, used as a parade ground, and now as a car park and performance space. Below are clickable thumbnails for some additional pictures taken on and around the Outer Defenses:
 |
After I'd looked around the Outer Defenses for a while, I went across the entry plaza and through the archway to the Queen Anne Garden.
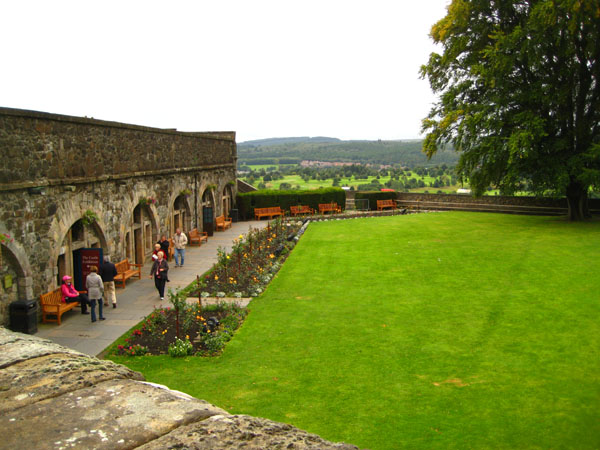
The Queen Anne Garden (and the King's Knot and King's Park)
|
This pretty garden was an important feature of the royal castle. Here the king and queen could stroll with their courtiers, watch entertainments or play games such as archery and bowls. (This area is also known as the Bowling Green Garden.) There are records of trees, plants and seeds being purchased to plant here, and of cranes and peacocks strutting about.
|
In the picture I took of these formal gardens, you can see that all that is left are the outlines of the earthenworks that formed the gardens. At the left in that picture is the King's Knot; the second, different area to the right is called "The Queen's Knot."
Beyond the King�s Knot, and stretching far into the distance, lay the King�s Park. This was the royal hunting forest, where the king and his courtiers could hunt for red deer and wild boar. James V was a keen huntsman. The hunt was often arranged so that the hunted beast was caught and killed within sight of the castle walls. The Ladies� Lookout beside the Palace would have provided a vantage point to watch the spectacle. From here they could also have admired jousts in the royal tournament ground below.
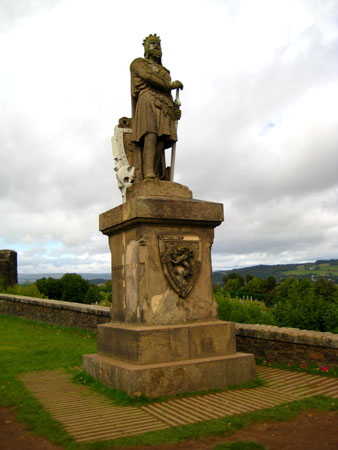
The Castle Esplanade and Other Pictures
|
Robert I (11 July 1274 � 7 June 1329), popularly known as Robert the Bruce (while we typically call him Robert Bruce, what we think of as his last name was more of a title), was King of Scots from 1306 until his death in 1329. Robert was one of the most famous warriors of his generation, eventually leading Scotland during the Wars of Scottish Independence against England. He fought successfully during his reign to regain Scotland's place as an independent nation, and is today remembered in Scotland as a national hero.
|
To view the slideshow, just click on the image at right and I will open the slideshow in a new window. In the slideshow, you can use the little arrows in the lower corners of each image to move from one to the next, and the index numbers in the upper left of each image will tell you where you are in the series. When you are finished looking at the pictures, just close the popup window.
From the parking area, we walked down the road back towards the van, intending to walk into the center of town to take some pictures and have some lunch.
A Walk Through Stirling, Scotland
|
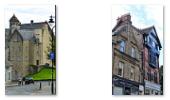
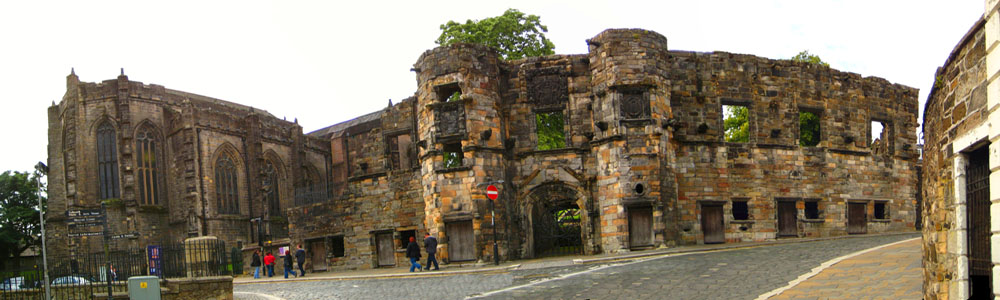
We were on the other side of Castlehill Road at this point, and so got different views of the complex of buildings that form the Church of the Holy Rude. There are clickable thumbnails below for a few of these views:
 |
Since I was now far enough back from the church to be able to get some pictures of the whole building, I stopped to take three pictures to stitch together into a single panorama; you can see that picture below:
 |
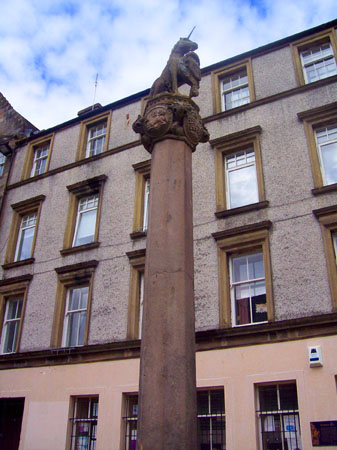
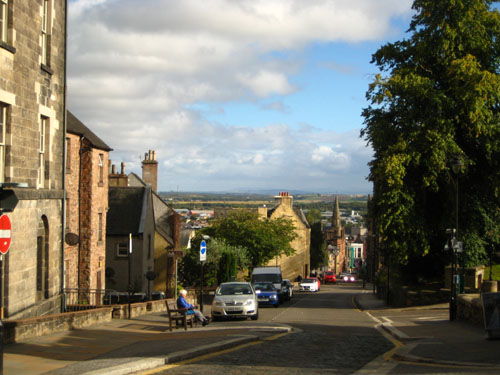
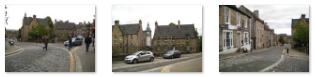
From the intersection, we walked down Broad Street two blocks until it ended in Bow Street, and then we took that to the right and then around to the left again as it became Baker Street and led all the way down into the center of Stirling. Along the way, we found some interesting buildings and sights to photograph, and came away with an eclectic collection. There are clickable thumbnails below for some of these pictures:
 |
|
As we continued down the streets, there were other buildings and sights of note; there are clickable thumbnails below for pictures of some of these:
|
I took one other picture that I thought was curious. It was a sign I saw on a recycle bin streetside; there was a unit that had separate compartments for different recyclables- just like here in the US. But I thought the sign kind of odd, and you can see it here. I suppose the Scots eat so much jam and drink so much milk that it's worth allocating an entire recycle bin to just the containers for those two foods!
When we got down into the center of Stirling, we found an interesting little pub and restaurant where we stopped to have lunch. There weren't any tables large enough for all of us, so the two couples sat at one table while Guy Fred and I sat at another on the other side of the room. The fish and chips was quite good. When we were done, we went across the street outside so Nancy could stop in a little antique shop.
|
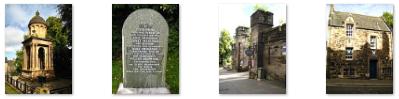 |
And below are clickable thumbnails for some of the photos Fred took on their way back up to the van:
 |
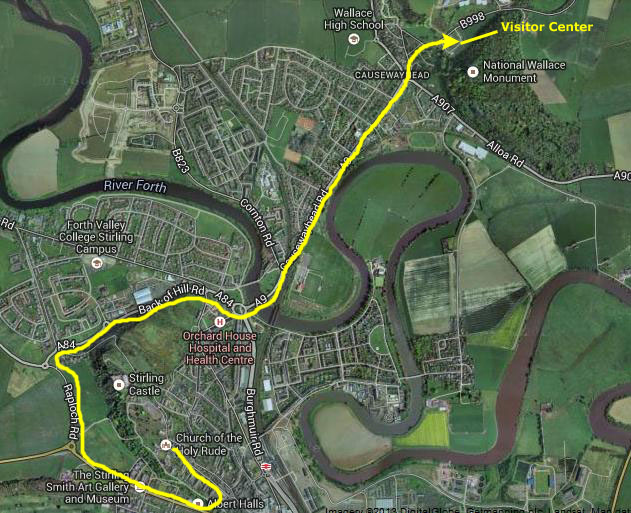
We piled into the van and headed off to our last stop in Stirling, the William Wallace Monument.
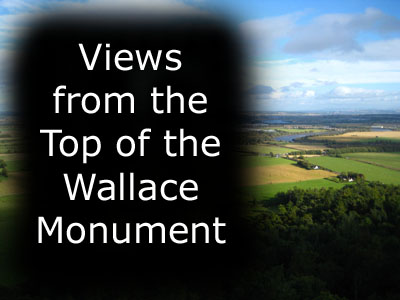
The William Wallace Monument
|
 |
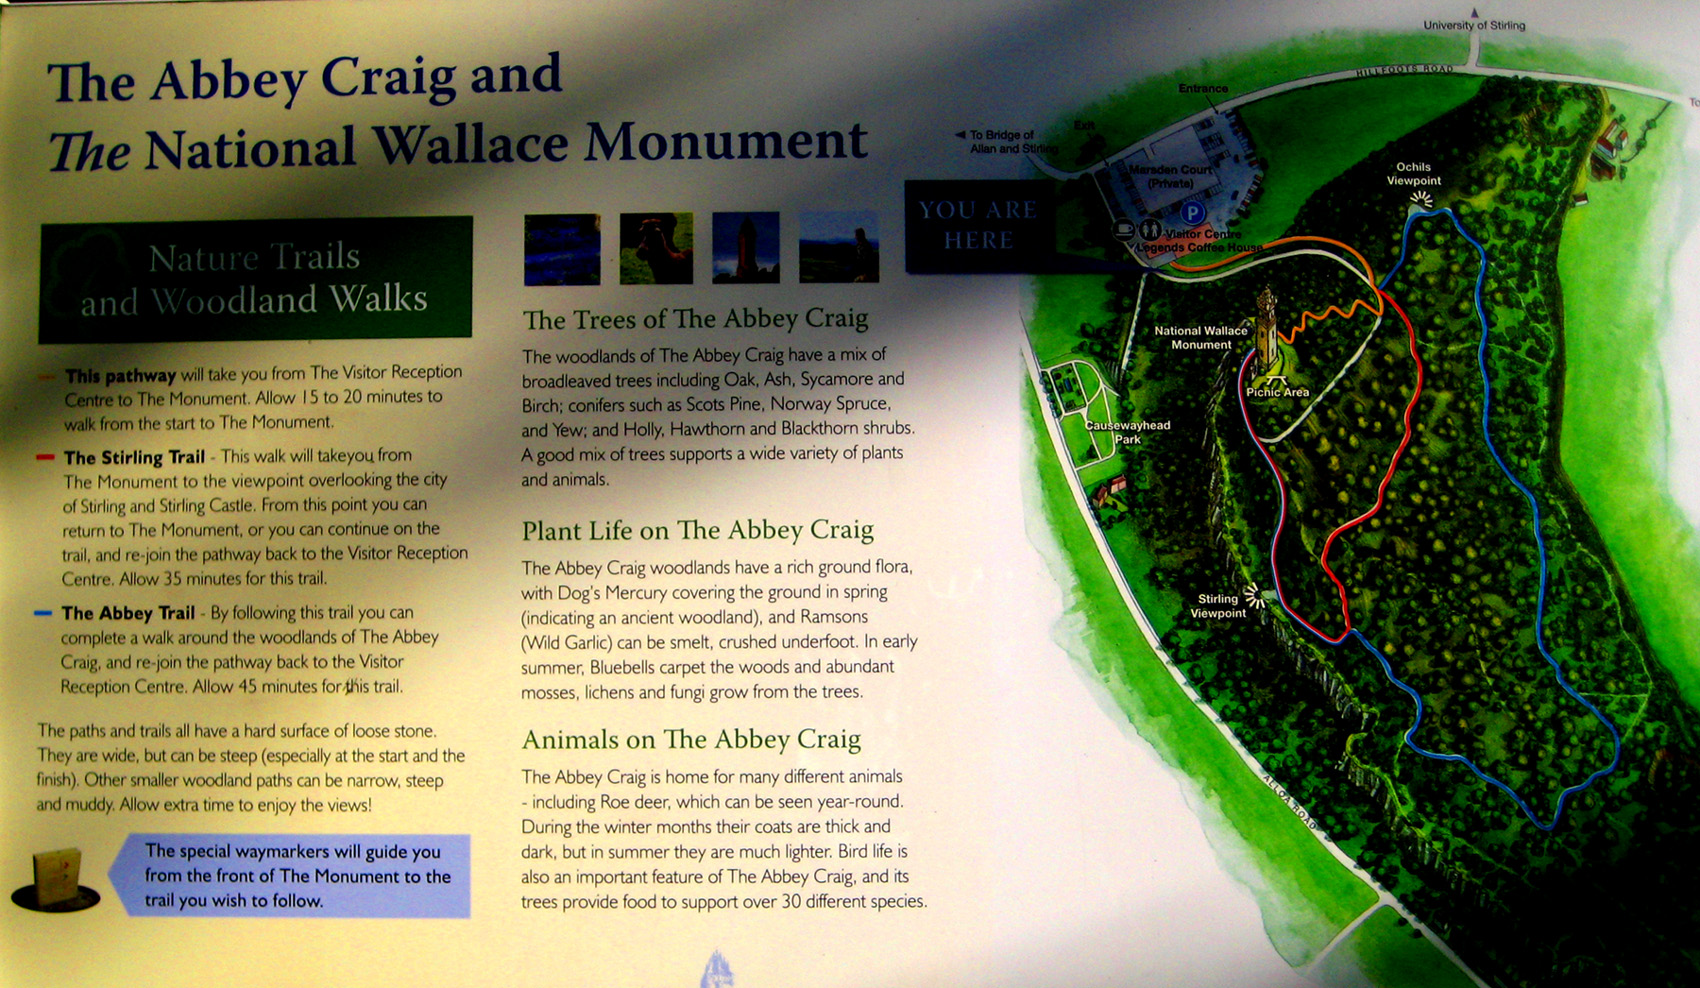
There was an interesting sign down by the Visitor Center that talked about the trails up to the Monument, and a bit about the flora and fauna in the area. If you would like to peruse it, just use the scrollable window below, left.
|
Since his death, Wallace has risen to an iconic status far beyond his homeland. He is the protagonist of the 15th-century epic poem The Wallace, by Blind Harry, was the subject of literary works by Sir Walter Scott and Jane Porter and the subject of the 1995 film Braveheart.
The National Wallace Monument (generally known as the Wallace Monument) stands on the summit of Abbey Craig, a hilltop northeast of Stirling, and from the plaza at the base of the tower, you can look back towards the town and see Stirling Castle on its own hilltop.
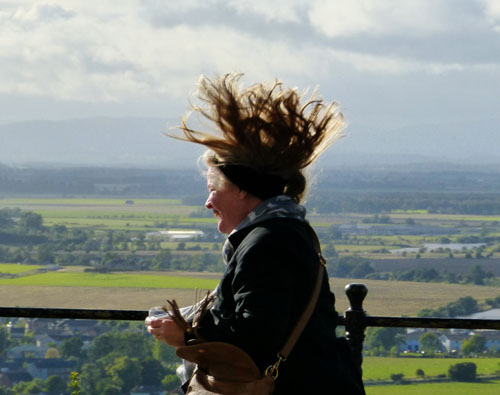
When we got up to the plaza at the base of the monument, out of the shelter of the forest, we found that it was extremely windy, and not just a bit raw.
|
|
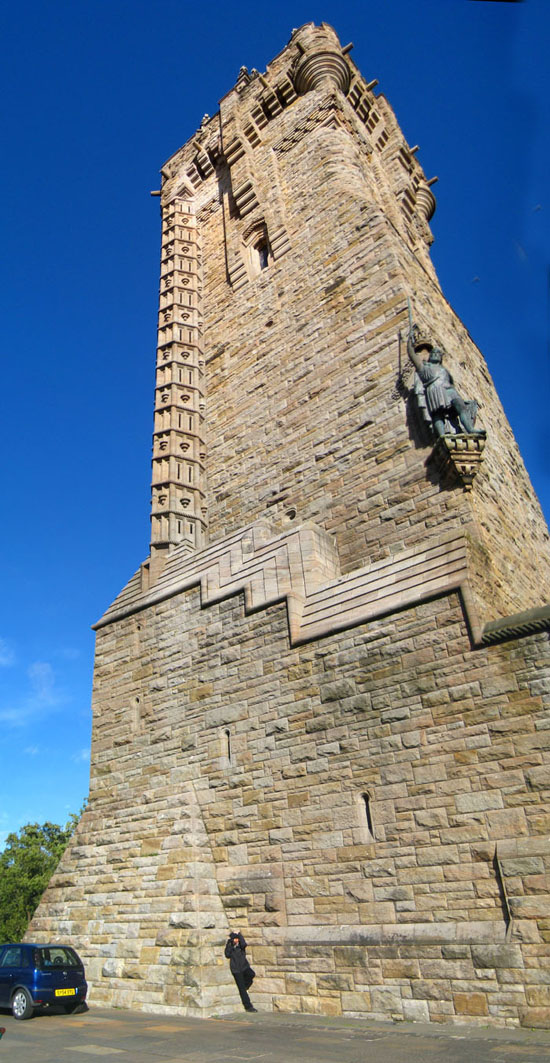
The National Wallace Monument tower was constructed following a fundraising campaign which accompanied a resurgence of Scottish national identity in the 19th century. In addition to public subscription, it was partially funded by contributions from a number of foreign donors, including Italian national leader Giuseppe Garibaldi. Completed in 1869 to the designs of architect John Thomas Rochead at a cost of $50,000, the monument is a 220 ft. sandstone tower, built in the Victorian Gothic style.
|
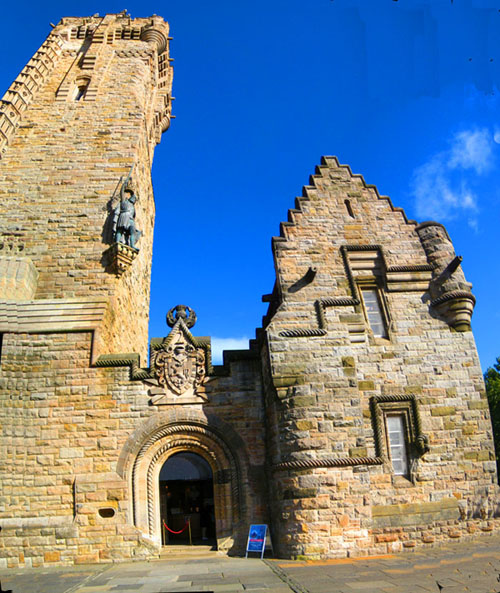
The Monument consists of the tower and observation room on top, an entry hall and another, shorter house-like building attached. I did not inquire, but it turns out that this building was the original caretaker's house; now used as a tea room and small display area. I did not go into it, but there are some busts of Scottish heroes (I would see more of these in one of the tower rooms), artifacts and quite a few interesting signs, which Fred photographed. If you'd like to read them, click on one of their titles below, and I'll open up a new window to allow you to have a look.
The statue of William Wallace on the outside of the building is solid bronze and was sculpted by David Watson Stevenson. It is situated approximately 30 feet from the ground, and the statue itself stands around 15 feet tall. Other motifs on the building include the Scottish Thistle and the Wallace coat of arms- surrounded by a knotted rope (see graphic above, right).
I want to include two more pictures Fred took of the tower; you can look at them here and here.
It was tough to try to get the entire tower in one shot; you could not get far enough back from the front of the monument. So I tried my hand at taking a series of pictures of the tower and then merging them together. You use the scrollable window below, left to see the result:
|
|
|
|
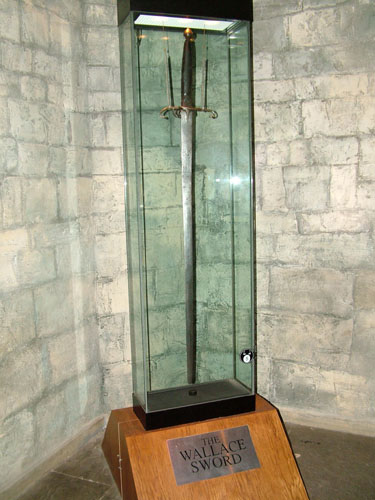
The sword is a traditional two-handed broad-sword, 71.5 inches in length. It weighs six pounds. Little is known about the origins of the sword for it carries no maker's mark and is therefore difficult to date. The quality of the metal used for the blade suggests that it may have been forged in Scotland (unlike other swords of the period which were often Flemish or German in origin).
It is known, however, that King James IV ordered the sword to be rehilted in 1505, so that it would be more fitting to Scotland's national hero. The size of the sword indicates that Sir William Wallace must have been at least six feet six inches tall.
The sword was traditionally kept in Dumbarton Castle until 17 November 1888 when it was handed over in Stirling Castle, to the Rev. Charles Rogers, the instigator of the project to create the Wallace Monument.
I didn't want to sit through the entire AV presentation, so I returned to the stairway to continue up. After another sixty steps or so I came to the second internal room in the tower. This one was called the "Hall of Heroes." The gallery contains busts of sixteen well known Scots, and you can see all of them if you watch the movie below, left.
|
The Hall of Heroes Inside the Wallace Monument |
I learned that a number of the busts have been presented to the Monument by both individuals and organizations and reflect 19th and early 20th century view, so the entire selection is not perhaps the "top 16" on everyone's list. (The inclusion of Gladstone in this company may seem particularly odd but although he was not born in Scotland, his parents were both Scots and he claimed "there is not a drop of blood in my veins that is not Scottish.")
Finally, I continued up to the top of the tower; there, I found expansive views of the Ochil Hills to the north and the Forth Valley to the east, south and west. The views up here were just incredible in every direction. I spent a good deal of time just walking around the square area underneath the stone arches. It was still very windy.
|
|
|
To view the slideshow, just click on the image at right and I will open the slideshow in a new window. In the slideshow, you can use the little arrows in the lower corners of each image to move from one to the next, and the index numbers in the upper left of each image will tell you where you are in the series. When you are finished looking at the pictures, just close the popup window.
When Karl and I were done up on top of the tower, we headed back down to rejoin everyone else. Only Fred, Guy and Ron Ruckman were still waiting for us, so we headed back together, and I discovered that from the southeast side of the Monument (where the road back down was) we could get a good view of the entire Wallace Monument. It was a pleasant, if chilly, walk back down the road through the woods to the visitor center, the girls, the van and the drive back to Edinburgh.
You can use the links below to continue to another photo album page.
|
September 17, 2013: Glamis Castle and Aberdeen, Scotland |
|
September 15, 2013: Sightseeing in Edinburgh (Day 2) |
|
Return to the Index for Our British Isles Trip |