|
September 14, 2013: Seeing the Sights in Edinburgh, Scotland |
|
September 12, 2013: Bristol to Haltwhistle; A Tour of Haltwhistle |
|
Return to the Index for Our British Isles Trip |
Yesterday, we'd mentioned to our hostess at Ashcroft that we want to take a tour of Hadrian's Wall, and she immediately got her husband, Jeff, involved.
|
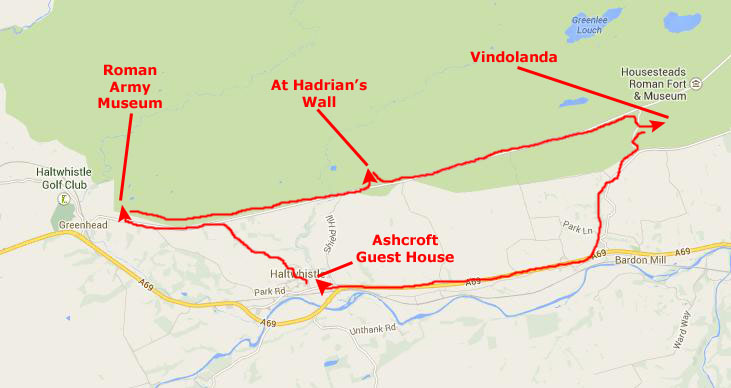
When Tom arrived at Ashcroft this morning, we talked with him about the tour. He does either half-day or full-day tours, but we only had time for the half-day version, as we still had to get to Edinburgh by this evening. We found that what he would do would be to first take us to the Roman Army Museum and then to one or two stops along the wall itself, so that we can see it and walk along it. Then he is going to take us to the ruins of one of the large garrisons built near the wall and give us a guided tour of it, ending up at its nearby museum. The whole tour will take four hours, and he has given us a very good rate for the whole group.
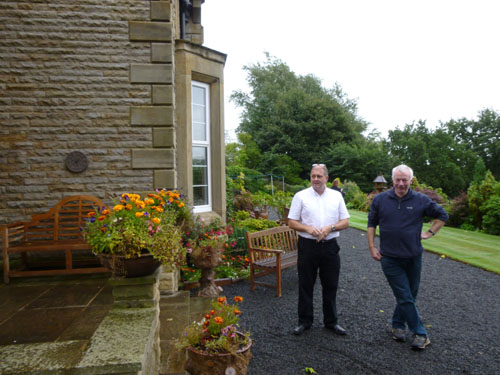
The only fly in the ointment was that there is some local ordinance that specifies a limit to how many passengers may be carried in a vehicle for hire, and that limit is six. But then Ron Ruckman said that he would prefer to stay at Ashcroft anyway (and have a couple of cigars in the garden), so the rest of us piled into Tom's vehicle and we headed off on our tour.
The Roman Army Museum
|
The day was overcast for the most part, but at least it didn't rain, and Fred was able to get a few interesting pictures of the countryside as we drove. There are clickable thumbnails below for a few of them:
 |
We eventually came to a main highway that Tom said paralleled the national park that surrounds most of the wall's route across England. The area is not really a National Park in the sense that we know them here, but a Trust Area that means its disposition is a matter of public involvement. Farms and private land comprise much of the Trust, but preservation efforts decree that none of the historically significant areas, the wall or the runs of the garrisons along it, can be removed or changed without the involvement of the National Trust of England.
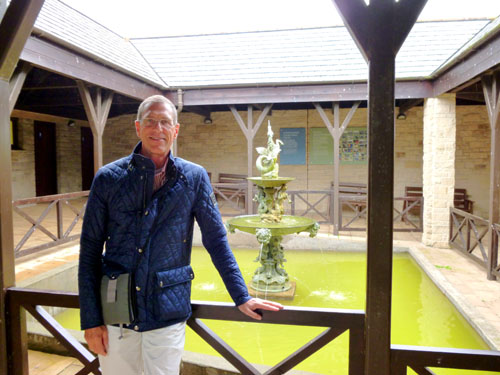
We turned west on this highway and drove a couple of miles, eventually turning north on the road to the Roman Army Museum. We stopped briefly outside, so Fred could take a picture of Guy and then we went on in.
|
|
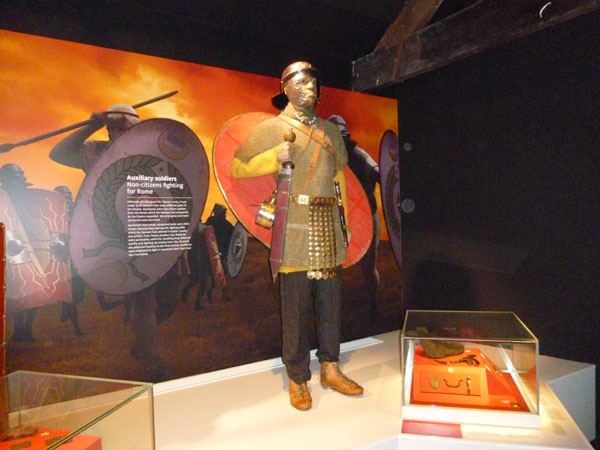
The second gallery was devoted to Hadrian�s Wall with a spectacular image banner of truly monumental proportions. A side room highlighted the successful invasion and occupation of Britain by the Romans and leads to the 3D film theatre. The very informative and entertaining 3D film gives an aerial view of the Wall as it is today then transports you back nearly 2000 years to Roman times and presents the wall and life along it from the point of view of a single soldier as he moves through assignments and up the ranks. The photograph and recreations were really great, and I am sorry now that I didn't buy a DVD copy of the movie.
|
To view the slideshow, just click on the image at left and I will open the slideshow in a new window. In the slideshow, you can use the little arrows in the lower corners of each image to move from one to the next, and the index numbers in the upper left of each image will tell you where you are in the series. When you are finished looking at the pictures, just close the popup window.
|
|
Fred did take one interesting movie of one of the exhibits- a lecture on Roman writing. It featured a motionless figure on which moving images were projected, giving the appearance of movement to the figure itself. It was an interesting exhibit, and you can use the player at left towatch Fred's movie of it.
After we'd had some time in the museum, Tom collected us and we headed out to have a look at the wall itself.
Hadrian's Wall
|
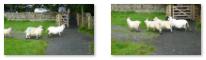
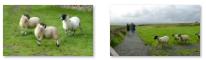
There was a path from the parking area down to the wall (through the sheep pasture, which actually contained some sheep). Just for fun, we took a few pictures of them as we were going down to the wall and as we were coming back. If you want to see them, use the clickable thumbnails below:
|
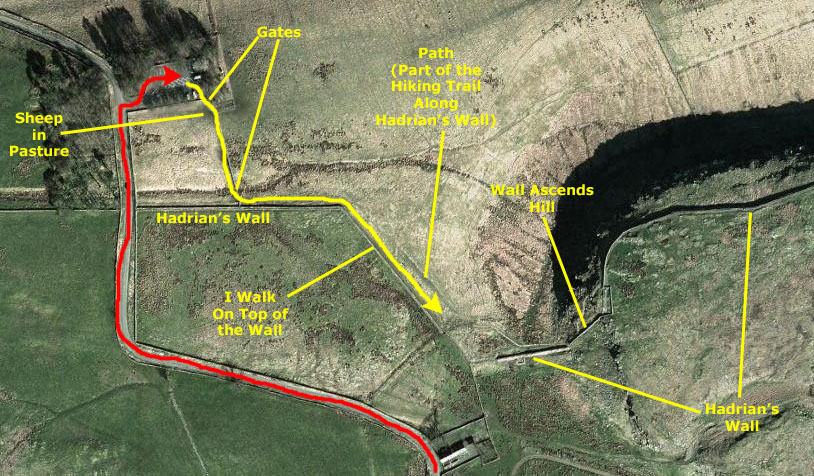
After we went through the first gate, a paved pathway led south down to the wall; it ran along the inside of the "sheep corral" that was itself made with a low stone wall. Tom told us that over the centuries, locals had scavenged the stones from the wall to make their own buildings and walls, and that this is one reason why the wall is as low as it is today. It was once ten or more feet high along its entire length; now it is barely four or five feet in some sections, like the one were going to see, fifteen feet high in some of the preserved areas and barely visible in many other areas.
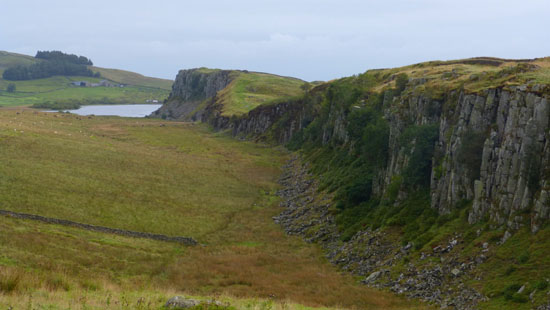
Inside the corral, our group paused as Tom described the landscape to the east. We could see quite far, past a series of low cliffs with the wall on top of them, past a lake in the gap between two hills and the wall continuing up the hill beyond that. We stopped to take some pictures of the scene, and you can use the clickable thumbnails below to see some of these:
 |
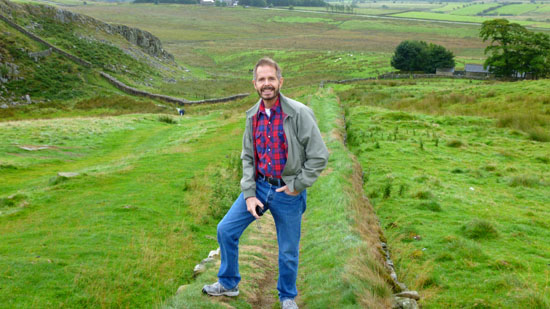
Then, as the group continued slowly down the path towards Hadrian's Wall, I couldn't resist and ran ahead to immediately climb up on it (not hard since it was only three or four feet high at the end of the path by the second gate).
|
To begin with, you can see below that the overgrown wall heads out in front of me to the east:
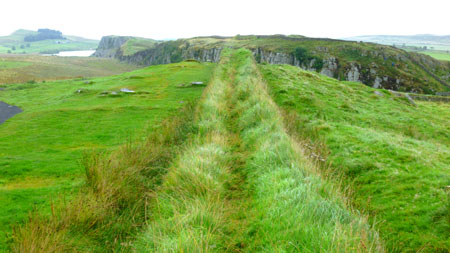 |
What I wanted to do now was walk down the wall to the east, and so I did so.
|
|
When I cut off the movie, I was only fifty feet or so from where the wall took an angular turn to the southeast to follow the ridgeline. At this point, I stopped to take another picture of the view ahead. Then I continued to walk down to the point where the wall turned, and I took a picture of the continuation of the wall down to the southeast ahead of me. You can see that picture here.
Standing here, the vista around me was certainly impressive, with the green hills, the grazing sheep and the remains of a 2000-year-old construction still visible ahead of and behind me. I wanted to create a panorama of the scene, but I also wanted to include some of the others who had walked down a path along the wall to my left. So I walked back up the wall a ways to my starting point and took six pictures, later stitching them together into a panorama. I have put it in the scrollable window below:

|
Guy climbed down from the wall while I walked all the way down the portion of it heading southeast until I got to the bottom and another gate and a place where I could climb down easily. Before I did, I took a picture looking back up the wall the way I had come. Although I would have liked to continue walking the wall up onto the next hill and to the top of the cliffs there, the others were calling to me to come on back so we could head somewhere else, and so I had to content myself with a picture of the continuation of the wall.
So rather than walk back up the wall to get back from the group, I climbed down from the wall, took one last look at the hills I would like to have climbed and headed back up along the wall to the paved path the others had been on.
While was up on top of Hadrian's Wall, walking along and taking pictures, Fred, Prudence, Nancy, Karl and Guy were walking along the paved pathway to the north of the wall itself, taking their own pictures. All of them were taking pictures of the wall and the landscape around it; some of them were taken as we returned through the gates to the parking area. I have put these pictures into a short slideshow.
|
|
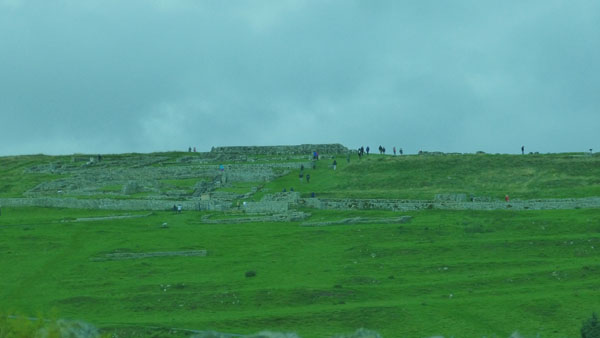
From our stop at Hadrian's Wall, Tom wanted to take us to the largest of the Roman ruins nearby- Vindolanda. To get there, we went back down to the highway and continued eastward. All along our drive, we could see the ruins of some of the small guardtowers along the wall, and in one particularly interesting picture Fred took, you can see one of them and the silhouettes of hikers walking along the wall's accompanying trail; have a look at it here.
|
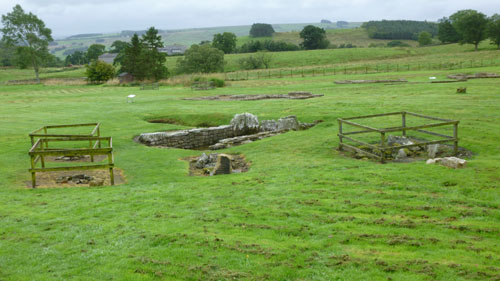
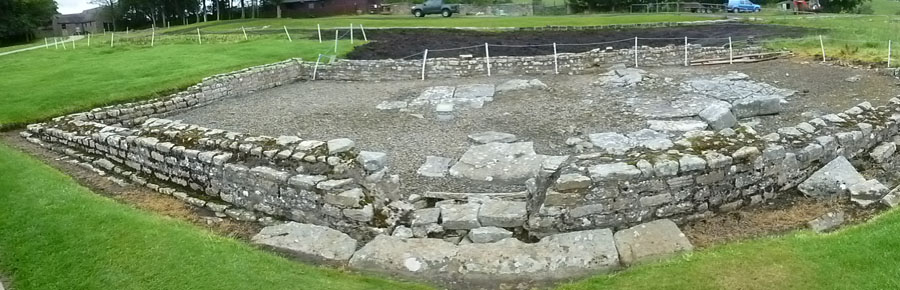
The fort was built around AD 124, soon after the construction of the Wall began in AD 122. A substantial civil settlement existed to the south, outside the fort, and some of the stone foundations can still be seen. The fort's orientation is unorthodox, in that its long axis is arranged parallel with Hadrian's Wall (which forms its northern defensive wall), due to the lay of the land. Most other early forts straddle the Wall and therefore protrude into barbarian territory. It is also unusual for Britain in that it has no running water supply and is dependent upon rainwater collection (for which purpose there is a series of large stone-lined tanks around the periphery of the defences). It also has one of the best-preserved stone latrines in Roman Britain.
Tom wanted us to spend our time at Vindolanda, which was much larger and more interesting, so we did not drive off the highway and up to Housesteads. Fred did, however, get a number of good pictures as we stopped by the side of the road to have a look. In addition to the picture at left, he took a number of zoom closeups, and you can use the clickable thumbnails below to have a look at them:
 |
The other interesting feature along the wall wasn't a structure at all. In fact, it was a single tree, and it had little to do with the Roman construction, having of course grown up only recently. So why is the lone tree noteworthy?
|
|
And you can use the clickable thumbnails below to see two more views of the lone tree and this section of the wall that we took from the roadside:
 |
After a short while, Tom found the turnoff on the road south that led to Vindolanda, and so that's where we went next.
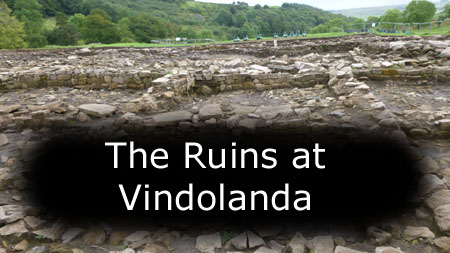
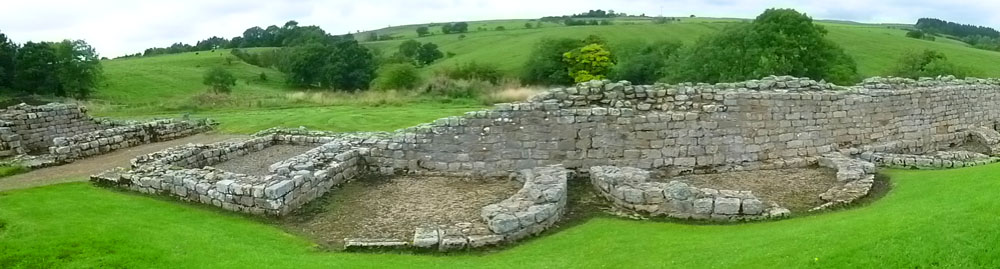
A Tour of Vindolanda
|
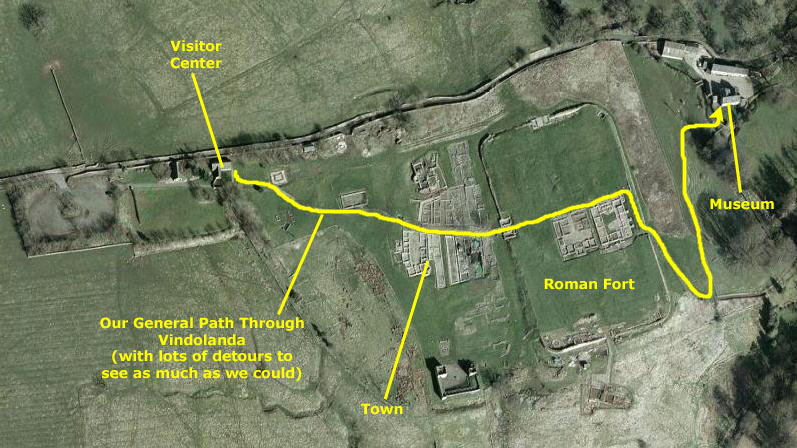
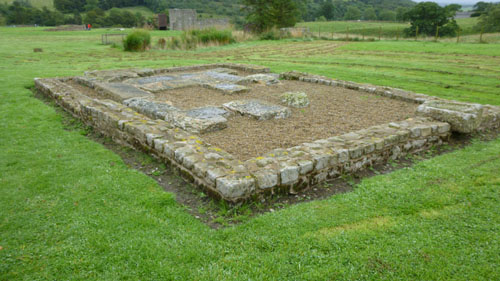
We began in the Visitor Center with some explanation from Tom, and then went out the east door and down a path to the first set of excavated ruins, those of the town that had grown up just west of the fort itself. Then we crossed over what had been the wall of the fort itself, which was in the shape of a rounded rectangle. The aerial photograph at left was taken, I am quite sure, some time ago, and a significant amount of further excavation has been done. For example, much more of the fort has been unearthed, and there were also many outlying buildings southwest of the town that you see that were also excavated and which I stopped at.
From the fort, we follwed the paved path down the hill to a small creek and the bridge across it that led to the museum. We spent about forty-five minutes there before Tom walked back to get the van and come via the road to pick us up.
We saw quite a lot, and took a lot of pictures, so I'll divide things up into sections.
The Vindolanda Visitor Center
|
There were also a number of sculptures about; these were not actually unearthed here at Vindolanda, but are copies of some found in British museums. Guy got a picture of Karl and Prudence with one of them, and Fred took pictures of two more, pictures that you can see here and here.
Just before we left the center, we stopped at a model of the Vindolanda site as it may have looked 1900 years ago. It was interesting, and we took a number of pictures of it and a recent aerial view on the wall beside it (use the clickable thumbnails below to have a look at them).
 |
I also made a short movie, here in the courtyard of the Visitor Center, and you can watch it with the player below:
|
|
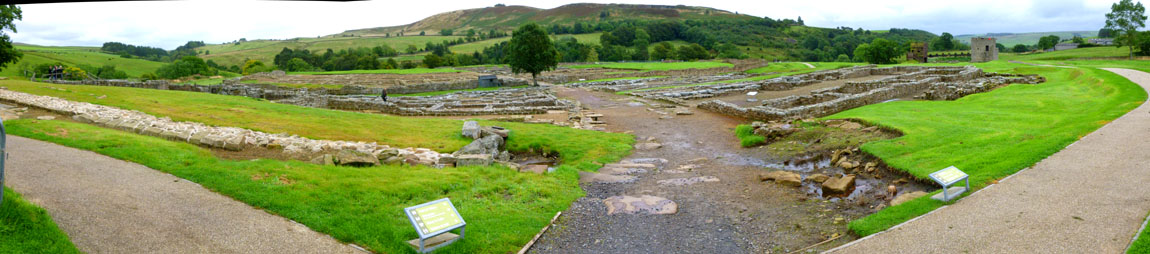
Tom then led us out of the Visitor Center to the Vindolanda site, walking us down the path that led through the center of the ruins of the town.
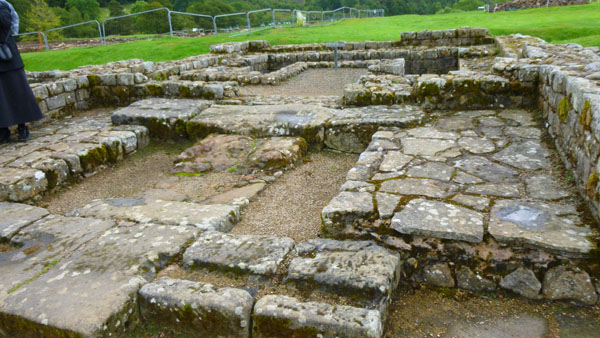
Ruins of the Town at Vindolanda
|
I got close to one of the wells to look down into it, and you can see it here.
Next was a series of larger ruins that the sign identified as workshops. These types of buildings were used for various purposes, and you can read the informational sign about them here.
|
There were also a couple of very small structures that are thought to have been mausoleums- small buildings that wealthy families used as burial places.
As I was heading back to join the group, I passed a large ruin that the sign identified as a possible storehouse for supplies for both the town and the military community. It was hard to get it all in a single picture, so I had the camera stitch together a more panoramic view:
 |
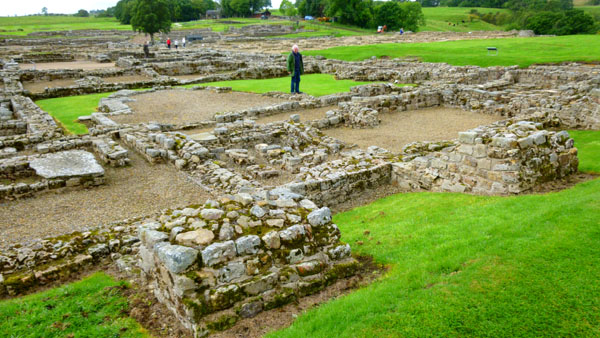
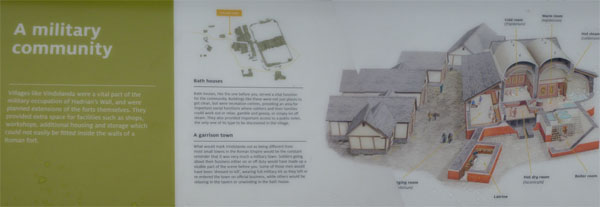
When I rejoined the group, we were at the beginning of the first of the two major sections of the excavated ruins here at Vindolanda- the ruins of the village that had grown up to the west of the fort. While we paused to listen to Tom for a while, I photographed the sign that described the two sections, and I thought it interesting enough to photograph so you could read it too:
 |
(I know that it might be tough to read the small print near the picture, so you can read an enlarged version here.)
Before we headed down to look at some aspects of the village part of the site, you can have a look at the vista that stretched out in front of us:
 |
First, we walked around to our left, following a paved walkway, which, at one point, crossed over a restored narrow aqueduct that brought water from springs located towards the top of the hill to the location where the village baths were located.
|
|
 |
As you can see in Fred's pictures above, I was standing out on the platform overlooking the baths area.
|
|
 |
While I was on the platform, Fred took what I thought was an interesting picture, looking across the north end of the vicus ruins, across the gap between the town and the fort, and to the north end of the ruins of the fort itself. You can have a look at that picture here.
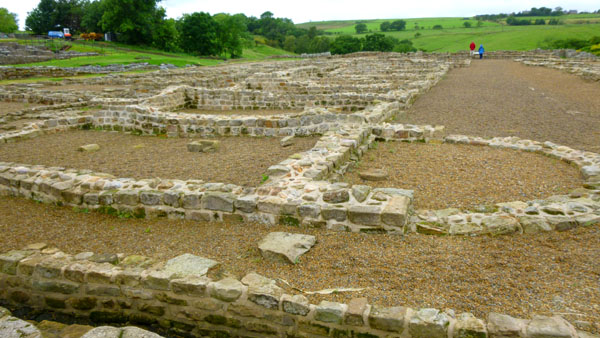
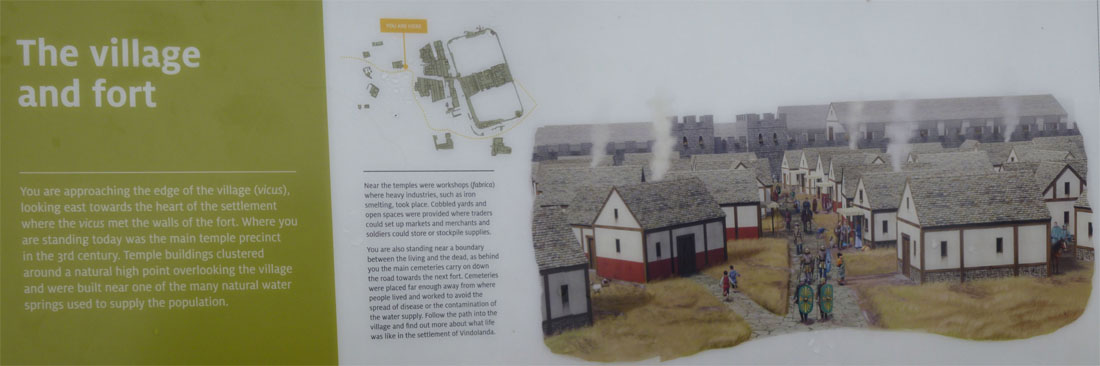
A vicus was a self-governing village, and this one developed to the west of the fort. The vicus contains several rows of buildings, each containing several one-room chambers. Most are not connected to the existing drainage system. The one that is was perhaps a butchery where, for health reasons, an efficient drain would have been important. A stone altar found in 1914 (and exhibited in the museum) proves that the settlement was officially a vicus, and that it was named Vindolanda. To the south of the fort is a large Roman bath. I had lingered at the baths, but eventually came back around and down to the main street of the vicus. You can see a view looking back from the main street towards the baths where we were just standing here.
|
We took a number of good pictures, and I want to share a collection of them with you. There are enough of these pictures that I've chosen a slideshow as your medium to view them.
|
To view the slideshow, just click on the image at left and I will open the slideshow in a new window. In the slideshow, you can use the little arrows in the lower corners of each image to move from one to the next, and the index numbers in the upper left of each image will tell you where you are in the series. When you are finished looking at the pictures, just close the popup window.
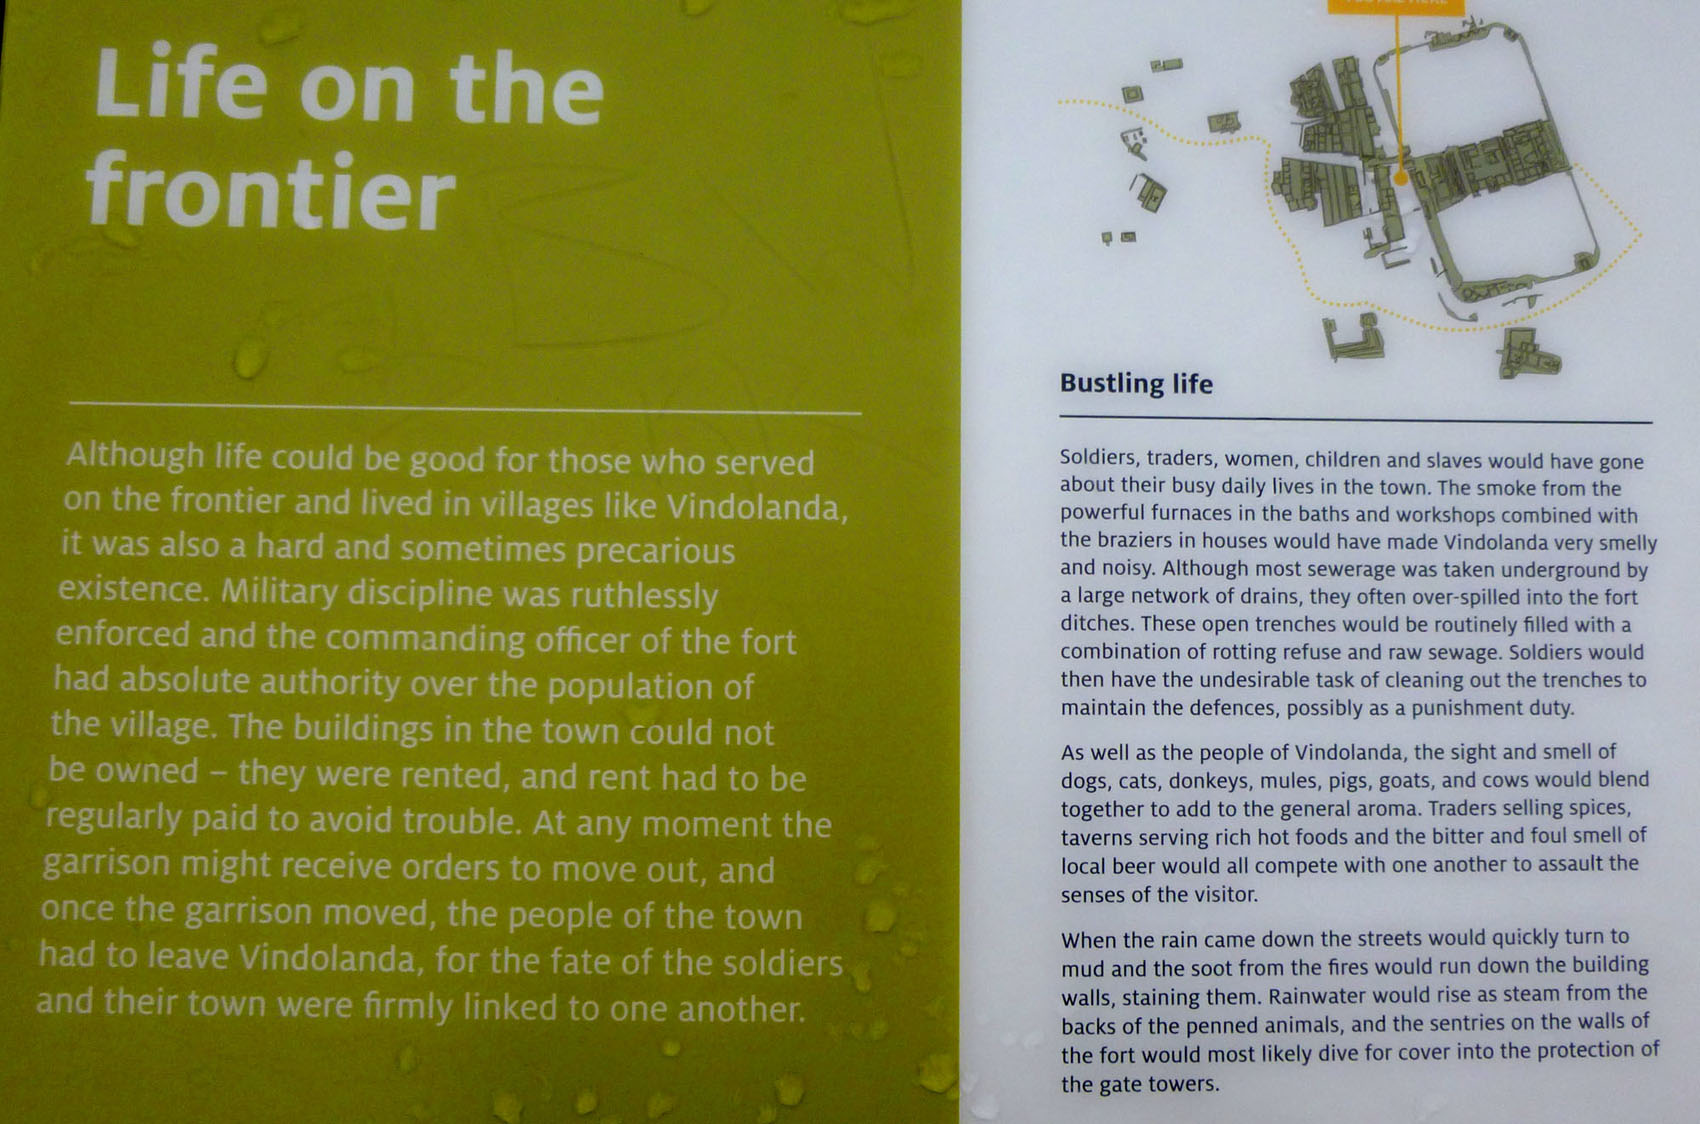
Just before we left the vicus area of Vindolanda, there was a interesting sign entitled "Life on the Frontier," and I thought you might want to read it, too. I have put it in a scrollable window below:

|
A sunken strongroom lay behind for storing the soldiers' pay and savings, and you can see its remains here. Below are clickable thumbnails for some additional pictures we took near the principia:
 |
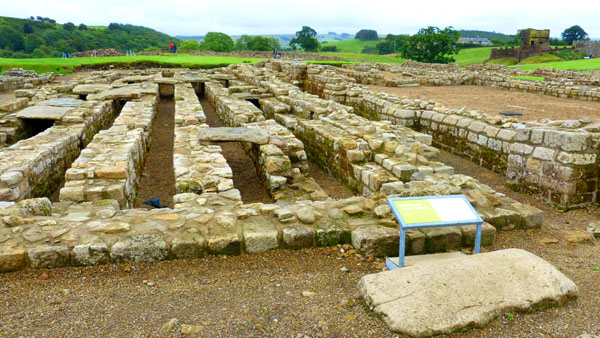
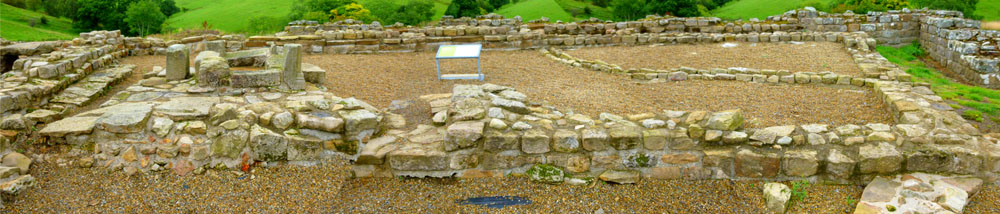
The ruins of the praetorium, the commanding officer's house, were towards the east end of the fort complex, diagonally across the main street through the fort. Tom spent some time amidst these ruins, talking to us about this set of remains.
|
We stood on the berm east of the ruins of the praetorium and listened to Tom's explanations. He was interesting, and so were the ruins themselves. While he was talking, Fred and I took a number of photos, and you can use the clickable thumbnails below to have a look at them:
  |
The third main building in the fort was the storehouse or horrea.
|
Here is my photo of Prudence and Fred at the horrea.
Near the horrea there were a number of other interesting ruins, and many of them had their own signs. For example, near the horrea were the ruins of a house- actually a 4th century house built onto the rampart mound and covering earlier ovens. Nearby was another group of ruins that the sign labeled as "a 4th century village inside the fort." You can read the sign here.
Adjacent to the granary and stores buildings, and back by the southwest mound wall of the fort complex, was a set of ruins marked as the "Dolichenum," a temple to Jupiter Dolichenus. It was so large I had to create a panorama to get it all in, and you can see that view below:
 |
If you would like to read the information sign in front of this particular ruin, you can do so here.
Another ruin nearby was the "round houses,", and it was also a long ruin, tough to get in one picture. So again, I created a panorama, and you can have a look below:
 |
If you would like to read the information sign in front of the ruins of the round houses, you can do so here.
The last of the labeled ruins was the most prosaic. One thing you never see in TV shows or movies (unless it is germane to the plot) are characters coughing, sneezing or needing to use "the facilities." Well, they do, but you just don't see them or have to deal with it. The Romans at Hadrian's Wall had to as well, and when they did, they used some like these. Naturally, there was a sign about these, too, but then how much information do you really want? The sign was short and sweet, but you can read it if you want to here.
|
To view the slideshow, just click on the image at left and I will open the slideshow in a new window. In the slideshow, you can use the little arrows in the lower corners of each image to move from one to the next, and the index numbers in the upper left of each image will tell you where you are in the series. When you are finished looking at the pictures, just close the popup window.
We were done in the ruins part of Vindolanda, and just before we followed Tom down to the Chesterholm Museum in the valley east of the ruins, I stopped to get what I think is a very nice picture of Nancy and Prudence just outside the boundary wall of the fort area. That wall was very interesting, and I asked Tom about it. The ruins of the wall were not in such good condition when it was originally uncovered, and a lot of restoration has been done to make it look as good as it does now.
At the bottom of the sloping walkway, we came to a little brook that ran through the valley from north to south. Right at the bottom of the walk was the replica of a milestone; the Romans set these up all over the empire, and local commanders often set them up just before the Emperor visited, as a good road system was seen by the Emperors as one way of cementing the empire together. This replica, as it turns out, is of the only such milestone found intact in Roman Britain. You can read more about it here. Passing the milestone, we crossed the picturesque stone bridge over the brook. You can see another view of the bridge, taken from a ways downstream, here.
|
  |
In the excavations at Vindolanda, three altars and a tombstone, all elaborately-inscribed, were found. The originals are in a nearby museum, but here in the glen there were exact replicas of them. You can't read the inscriptions in my photo, but you can on the informational sign beside them, so have a look here.
|
I took just a few photographs (not actually allowed, but there were no docents around) inside the museum, and you can use the clickable thumbnails below to have a look at them:
 |
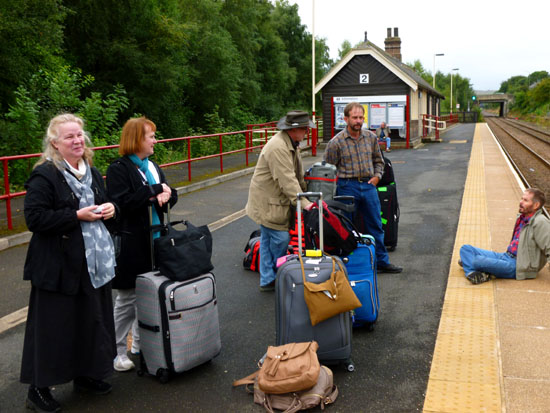
We only had an hour in the museum before Tom brought the van around to pick us up and return us to the Ashcroft Guest House in Haltwhistle. It was a great tour, and well worth the $100 it cost. At the guest house, we found that Ron had spent a very relaxing morning in the living room and wandering around enjoying a cigar or two. When we were all ready to head over to the train station, we called the same taxi we'd used the day before, and began to pile into it.
The Train to Edinburgh
|
Ron, Prudence, Nancy and Karl took up seats down by the little waiting-room building trackside, I got a couple of good pictures of them. You can see those pictures here and here.
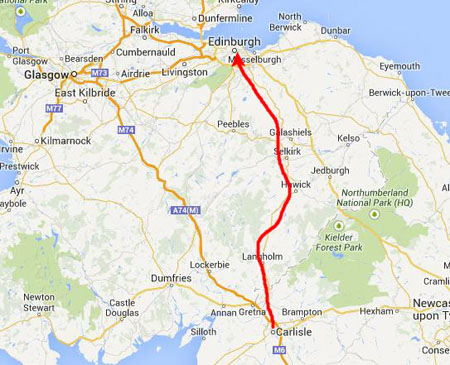
The train came along fairly quickly, and we got aboard for the 45-minute ride to Carlisle.
At the Carlisle station, we didn't have to worry about a repeat of someone staying on the train, because, as you saw yesterday, the Haltwhistle train begins and ends in Carlisle; it has its own, dedicated track there. In one of the photos I took in the Carlisle station, you can see the Haltwhistle train waiting to head out again.
|
Our train arrived, we got on, stowed our luggage, found seats together and were off to Edinburgh.
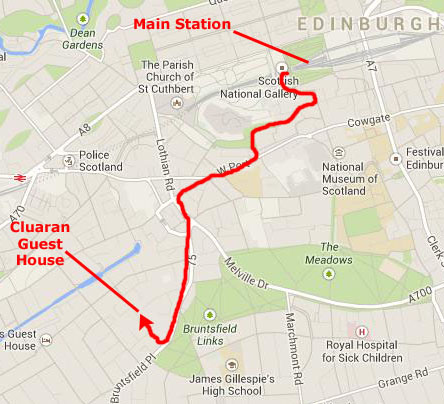
An Evening in Edinburgh
|
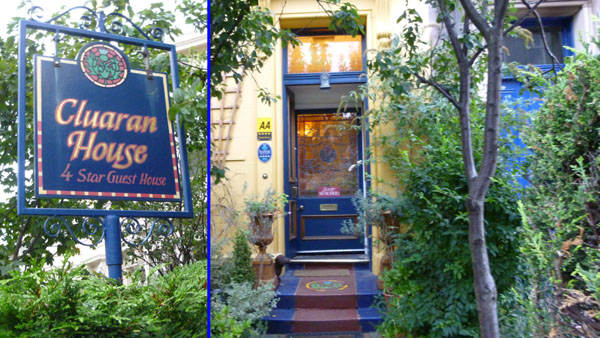 |
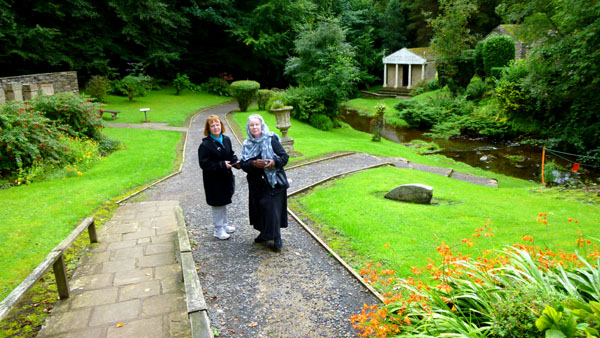
Going inside, we met the hostess, got our rooms and then got all our luggage up to the second floor; all our rooms were on that floor. It had been a long day so far, so before we headed out for some dinner, we all took the time to relax for a while. During our three days in Edinburgh, we took quite a few pictures in and around Cluaran House, but I'll collect all of those into a single section that you'll find two album pages hence.
An hour or so later, we all agreed to meet downstairs. I got down a bit early, so I went outside to take a few pictures on the street in front of the guest house. One of them looks up Leamington towards Bruntsfield, and you can see the Bruntsfield Evangelical Church on the west side of the street. Another picture was a view looking down the street (that direction is northwest). And here is a view looking right at the yellow-painted Cluaran Guest House.
|
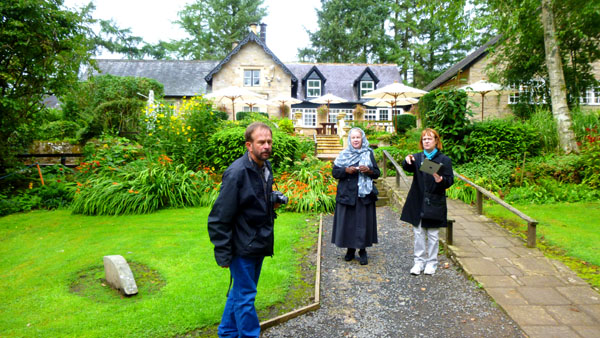
Below are some clickable thumbnails for some pictures I took on the way to dinner and also later, when we took a short walk afterwards:
 |
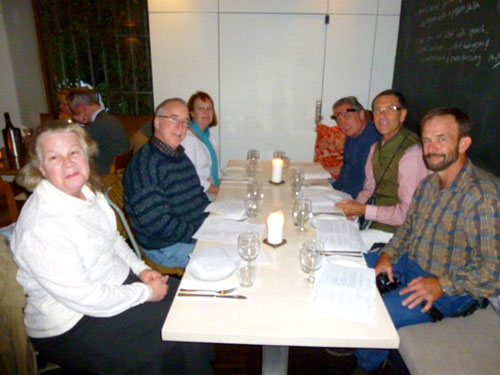
It was quite chilly after dinner, but we did take that short walk before heading back to Cluaran House for a good night's sleep.
You can use the links below to continue to another album page.
|
September 14, 2013: Seeing the Sights in Edinburgh, Scotland |
|
September 12, 2013: Bristol to Haltwhistle; A Tour of Haltwhistle |
|
Return to the Index for Our British Isles Trip |