|
June 24, 2003: Western Trip, Day 4 |
|
June 22, 2003: Western Trip, Day 2 |
|
Return to the Index for Our Western Trip |
|
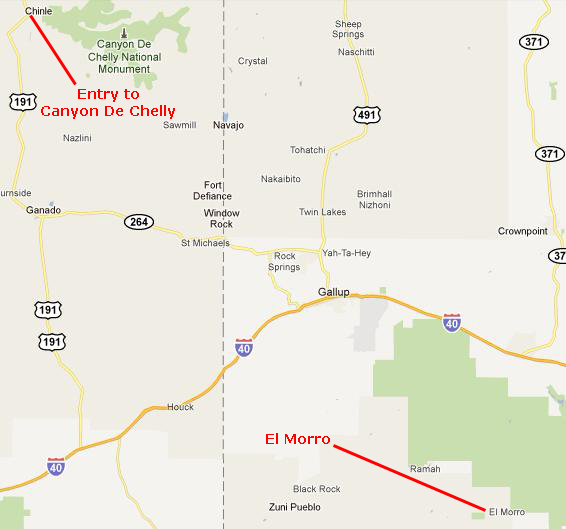
June 23 Junction Cave in El Malpais NM El Morro NM Camping on Navajo Land |
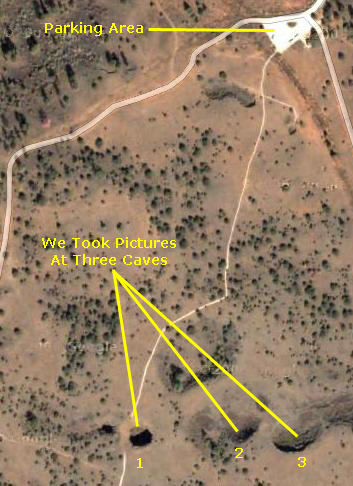
Well, it's Monday morning, and we are up and gone from the Super 8 about ten in the morning, heading back down into El Malpais National Monument to make a stop at Junction Cave.
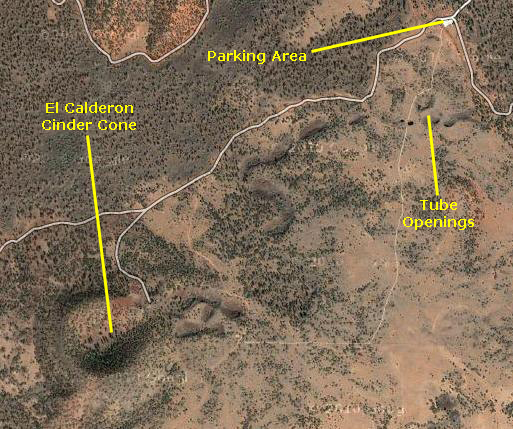
Junction Cave in El Malpais National Monument
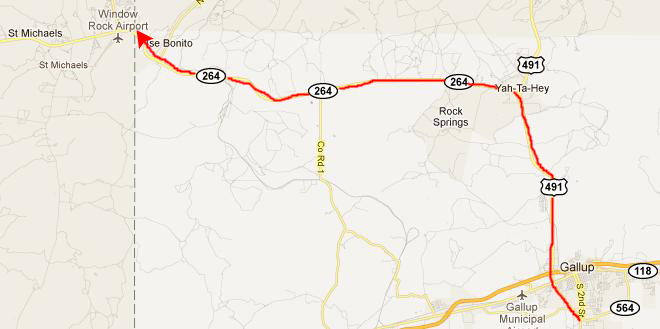
Getting to Junction Cave
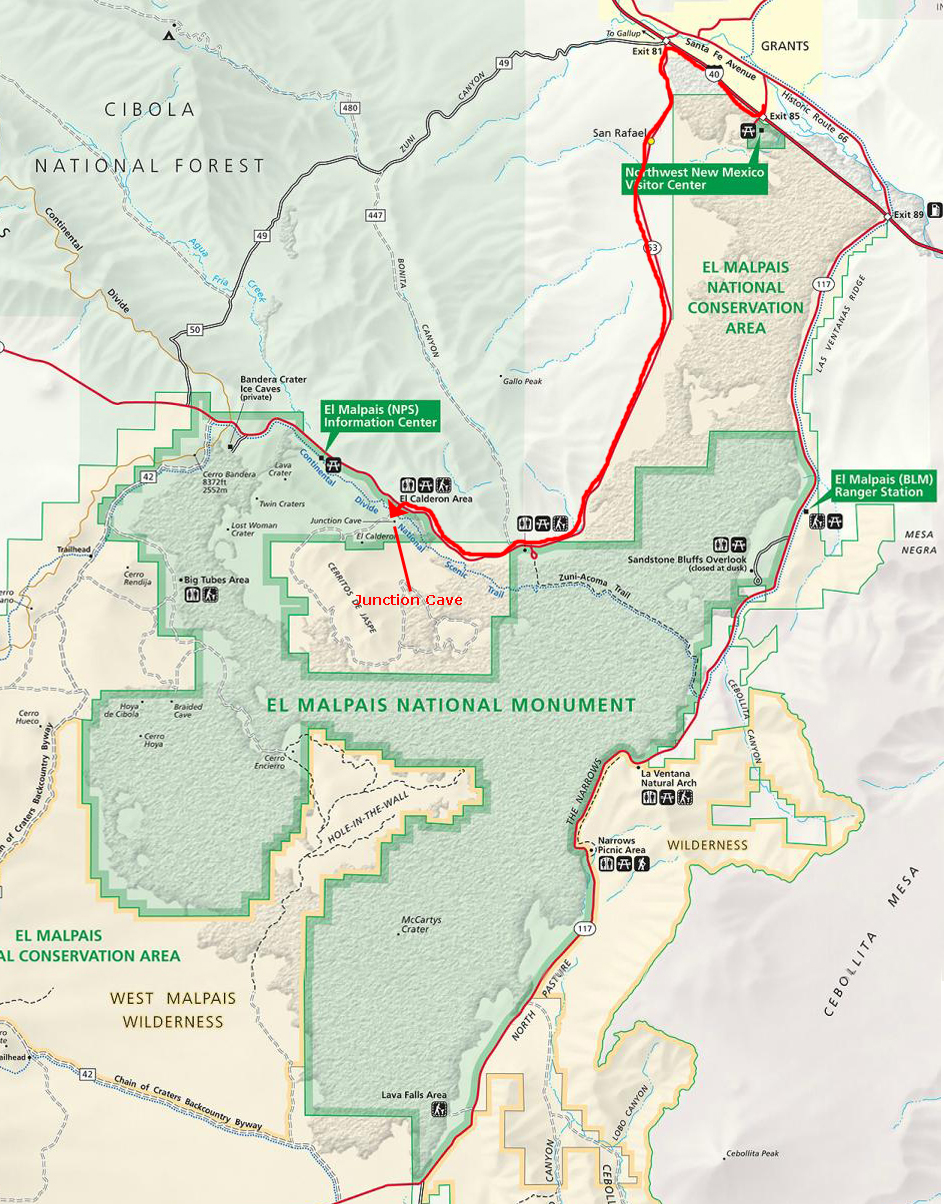 |
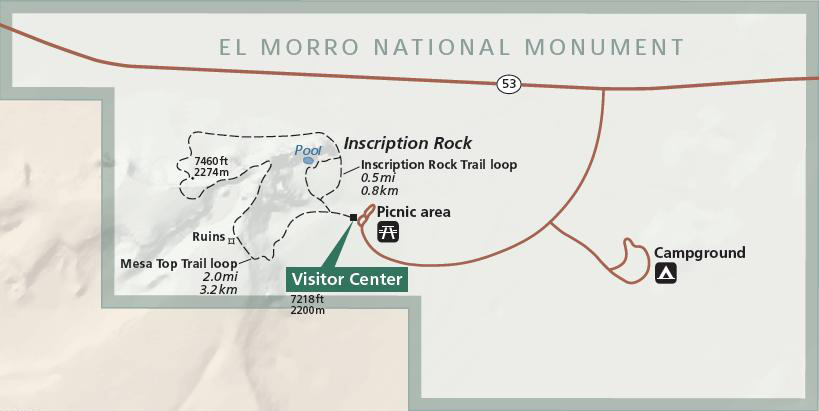
You can follow our route (and look at a map of the entirety of El Malpais NM) using the scrollable park map in the window at left.
|
History of the El Malpais Lava Caves
We were lucky, I guess, to have been here this year, long before the closure took effect, so that we had a chance to clamber in and around the caves. If you are unaware of what a lava tube is, a short explanation will suffice. During the volcanic eruptions here at El Malpais about 3,000 years ago, lava flowed across the landscape. As lava flows slow, cooling on the surface forms a solid crust of rock that becomes stationary, even though lava continues to flow underneath. Eventually, when the eruption ceases and the lava flows stop being replenished, the still-molten rock continues to flow underneath that crust until it has emptied out. What is left is, in effect, a natural tunnel. Because the "roof" of such tunnels is usually only a foot or so thick, natural erosion can cause the roof to collapse fairly quickly, depending on whether other soil is deposited on top, vegetation growth and weather conditions. In the arid southwest, weather was no so much of a factor, but over thousands of years collapses were inevitable. The result is that here at El Malpais, as in Hawaii and Arizona, long tunnel lengths may still exist, even though sections of the roof may have collapsed. Just a short distance from the parking area, we encountered more than five collapsed tunnel sections, three of which afforded access to the existing tunnel system.
We Enter the El Malpais Lava Caves
|
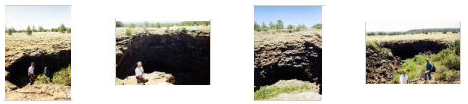
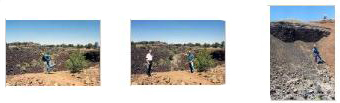
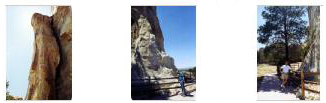
The first cave opening we visited was our introduction to these lava tubes, and we did a fair amount of climbing around at the entrance. This one had a sign saying that the opening was closed, although we found out later that it is one of the openings that requires some preparation to enter and navigate to come out at one of the other openings. Click on the thumbnail images at left to see some of the pictures we took here.
Cave Opening 2:
At the middle opening, we found that we could climb down the rocky boulderfall at the entrance and get down into the tube itself. This was almost like going into a regular cave, although we could see light at the end when we shut off our flashlight. I supposed we could have gone through to another opening, but we didn't. I've put thumbnails for the pictures we took in this cave below; just click on them to view:
|
|
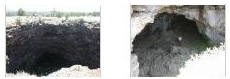
The third cave opening we explored was the one right next to the path down from the parking area. It was another rocky opening, and we were able to climb down into it. You could see where the tube had been, but there were lots of collapsed rocks and it didn't look as if you could get very far.
|
The El Calderon Cinder Cone
|
We took a few good pictures here, and if you click on the thumbnails below you can have a look at them:
|
Well, that was about it for Junction Cave and El Calderon. Now we are off to our next point of interest- El Morro National Monument.
You can return to the page index or continue on to the next section.
The El Morro National Monument
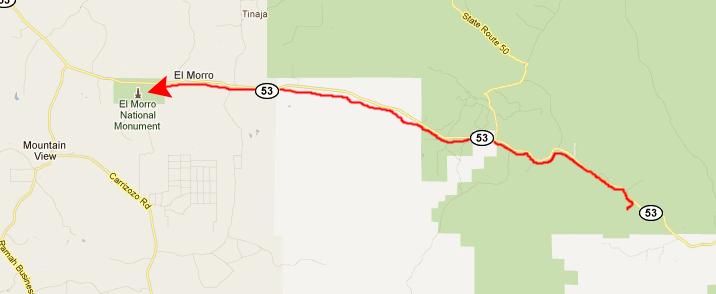
Getting to El Morro National Monument
|
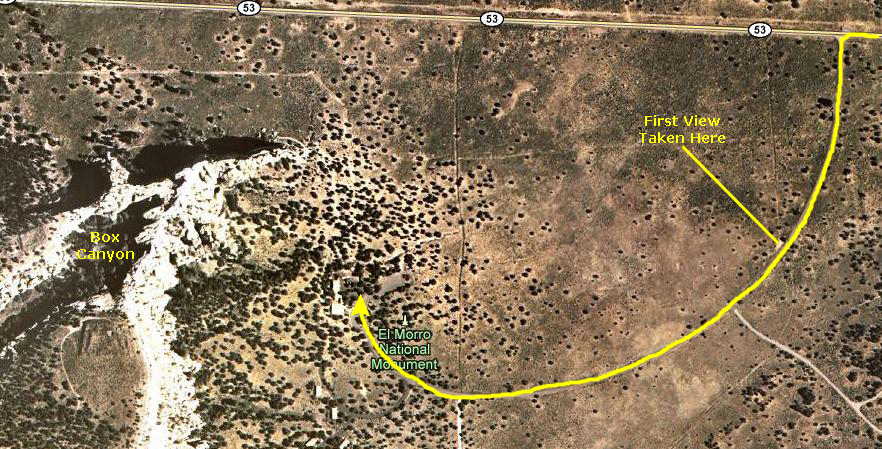
Here is an aerial view of El Morro National Monument:
|
History of El Morro National Monument
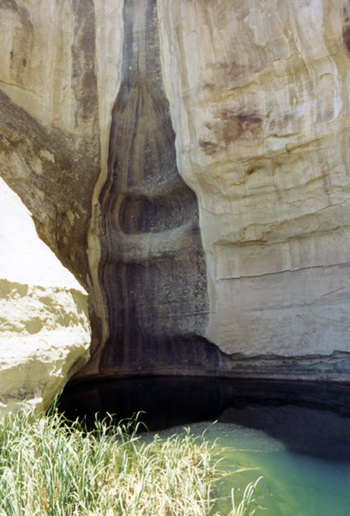
Most of the inscriptions were carved into the rock adjacent to the natural pool, and the carvings date to the Spanish arrival in Mexico in the 1500s. Anglo-Americans later began carving their names in the 1850s and 1860s when they served in the Army and homesteaded the area.
In 1906, El Morro became a National Monument in order to protect the carvings.
Our Walk Around El Morro National Monument
|
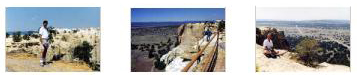
We had the time and wanted to do it all, so we followed all the trails that you see on the park map at left. We began by following the sandy path that led from the visitor center over towards the base of the cliffs. There, we picked up the paved walking trail that allows everyone to at least view the pool and inscriptions.
The Inscription Trail
|
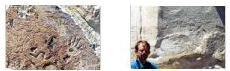
It is in this area of the cliffs that we find most of the inscriptions that have been carved into the rock over the years by Spanish and Anglo visitors. One of the earliest was an inscription carved in the rock by Don Juan de Ońate 15 years before the Pilgrims landed at Plymouth Rock -- "Passed by here the Adelantado Don Juan de Ońate, from the discovery of the Sea of the South, the 16th day of April of 1605." In 1680, the Pueblos had revolted against Spanish rule and the Conquistadors had been thrown out of the colony. In 1692, a returning general carved (in Spanish) "Here was the General Don Diego de Vargas, who conquered for our Holy Faith, and for the Royal Crown, all of New Mexico at his own expense, year of 1692 ." The last Spanish inscription was carved in 1774. "Por aqui paso Andres Romero." You can see some good examples of these Spanish carvings here and here.
Anglo inscriptions date from the 1800s. The first US Army Officer to visit El Morro was JH Simpson, in 1849. His carving, which you can see here, reads: "Lt. J.H. Simpson USA & R. H. Kern, Artist, visited and copied these inscriptions, September 17th 18th 1849."
To see more pictures of the inscriptions, click on the thumbnails below:
|
|
The Headland Trail
|
|
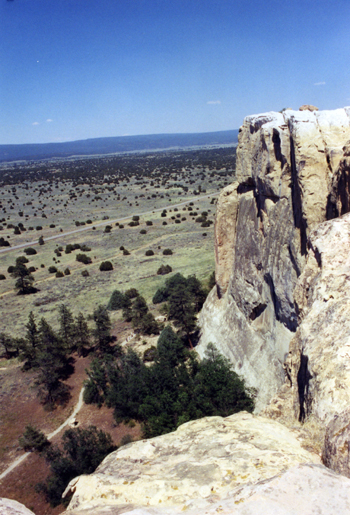
Indeed, the trail began to ascend over an uneven sandstone surface and became slightly strenuous. We left the pavement behind shortly after the trail began to ascend on its 250 ft. climb to the top of the mesa. As we climbed across the western face of the mesa, we were treated to better and better vistas- and we could also see that a vertical column of rock that we'd seen from below looked as if it was about to fall off. Eventually, we came out on top of the mesa and we were rewarded with spectacular views of the Zuni Mountains, the volcanic craters of the El Malpais area, and the El Morro valley. If you will click on the thumbnail images below, you can experience some of the beautiful vistas that we saw from the top of El Morro:
|
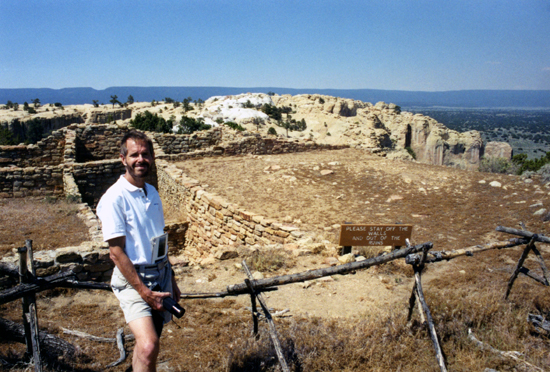
The top of the mesa was pretty flat, and easy to walk around. Fred walked over to the southwest side of the mesa, and I followed him to get an excellent view of the box canyon and its central, free-standing spire of rock.
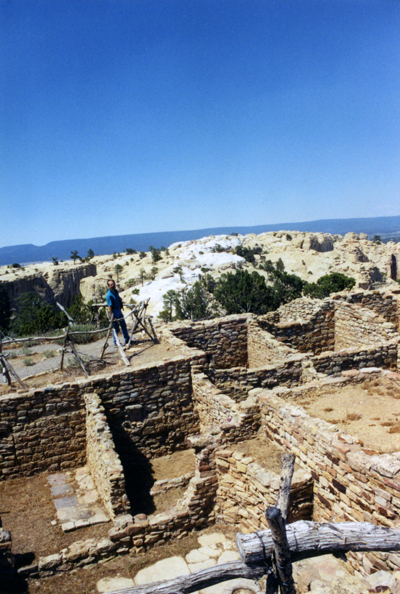
Atsinna
|
|
This hike concluded our visit to El Morro National Monument, and we stopped again at the Visitor Center to plan our next moves. The next stop on our list was to be Canyon de Chelly over in Arizona, and the drive to get there would be at least a few hours. Since it was already mid-afternoon, we thought that we would get about halfway there and look for a campground where we could stay the evening.
You can return to the page index or continue on to the next section.
|
|
|
Although we thought there was supposed to be a $5 fee, we couldn't find anyplace to deposit it; perhaps there is some office in one of the towns nearby that you are supposed to use, but we had no way of knowing. In any event, we were the only folks in the camping area, which was about a mile north of the highway up by a small lake.
We found a flat area for the tent and I set it up while Fred got busy trying to find someplace where he could set up the little camp stove. We finally just set it up on the ground, and sat on a blanket while we had some supper. There being nothing to do except read once it got dark, we just turned in, and spent a pleasantly-chilly if not just a bit windy night all by ourselves in the mountains by a lake.
You can return to today's index
or use the links below to continue to the album page for different day.
|
June 24, 2003: Western Trip, Day 4 |
|
June 22, 2003: Western Trip, Day 2 |
|
Return to the Index for Our Western Trip |