|
July 16, 2007: New Mexico/Colorado Trip Day 3 |
|
July 14, 2007: New Mexico/Colorado Trip Day 1 |
|
Return to Main Index for New Mexico/Colorado Trip |
Las Vegas, NM
We got back to the town of Las Vegas late last night, and we had just a bit of trouble finding a place to stay. All the chains where we usually stay (read: Super 8 Motel) were full, but we found a good room at the Regal Motel on the north side of town. Problem was, it was getting late and all the restaurants were closing.
We drove through town once or twice, and finally settled on the Hillcrest Restaurant. They had a large, varied menu, and it was just what we were looking for. We also found out that they were the premier breakfast place in town, so we planned to stop back in the next morning as well.
The Regal Motel was certainly satisfactory, if not luxurious, and the next morning found us with an omelet and pancakes back at the Hillcrest. (If you want to visit their website, and are currently connected to the Internet, click here.)
On our way out of town and down to Santa Fe, we passed an interesting mural painted on a side of a building just down from the restaurant. As the mural depicted a buffalo, Fred wanted to get a picture of it.
Rio Grande Dam
 |
 |
There are actually some little islands in the river at this point, which made for an interesting shot. To finish our stop here at Cochiti Dam, Fred took a picture of me on the bridge, and I took a movie of the Cochiti Dam and Rio Grande; use the player below to watch it:
|
|
Tent Rocks National Monument
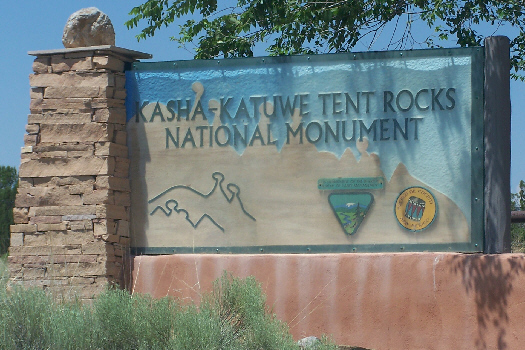
The Kasha-Katuwe Tent Rocks National Monument is a remarkable outdoor laboratory, offering an opportunity to observe, study, and experience the geologic processes that shape natural landscapes. The national monument, on the Pajarito Plateau in north-central New Mexico, includes a national recreation trail and ranges from 5,570 feet to 6,760 feet above sea level.
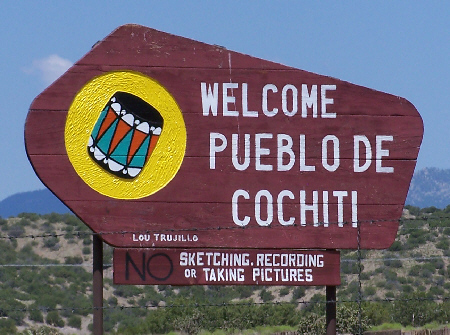 |
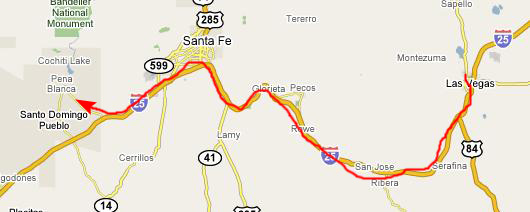
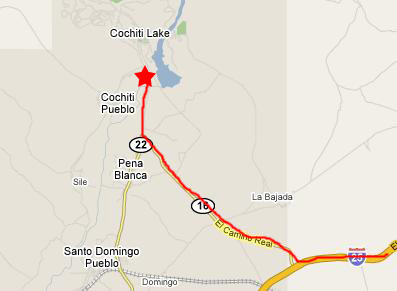
The road to Tent Rocks turned left with NM22 as it headed through Cochiti Pueblo, the entrance sign for which you can see here. After 1.8 miles, at the end of NM22, we turned right onto FR266, a bumpy dirt road. Then we reached an "entrance station" for the monument, which consisted of a couple of Native Americans collecting a $10 fee. I suppose that since the monument is apparently on their land, it is certainly their right to do so. Then it was 4.8 miles down the road until we reached the parking area for Tent Rocks National Monument.
 |
In 1540, the Spanish explorer Francisco Vasquez de Coronado encountered the Pueblo de Cochiti. Throughout the 17th century, settlers would follow Juan de O�ate�s route along the Rio Grande Valley, bringing trade, farming and domestic animals, and claiming land grants from the Spanish Crown. In 1680, the Cochiti people joined other pueblos in a rebellion that drove the Spaniards south to El Paso, Texas, but the Spanish returned permanently in 1692. By 1870, iron rails stretched into the territory of New Mexico bringing loggers, miners and others to enjoy its rich natural resources.
In the midst of the formations, clinging to the cracks and crevices high on the cliff face, the vibrant green leaves and red bark of the manzanita shrub stand in sharp contrast to the muted colors of the rocks. A hardy evergreen, the manzanita produces a pinkish-white flower in the spring that adds to the plant�s luster. Other desert plants found in the area include Indian paintbrush, Apache plume, rabbitbrush, and desert marigold. Depending on the season, you are likely to see a variety of birds. Red-tailed hawks, American kestrels, violet-green swallows, Western Scrub-Jay, and an occasional golden eagle soar above the area or use pi�on-covered terrain near the cliffs.
This is a unique area, and, as one of the signs told us, has been used as a backdrop or filming location for numerous movies and TV shows. Among the movies mentioned were "Silverado," "Lonesome Dove," "Young Guns II," "High Desert Kill" (all westerns) and, for a change of pace, "Earth II" (science-fiction).
Before we head off on some of the trails here, it might be good for you to look at some of the panoramic views of the general area. In a little while, we'll look at some views of the cliffs and cliff formations, the actual "tent rocks" and some shots along our first trail. After parking the car and heading up the trail just a bit, we were able to get some beautiful and representative shots of Tent Rocks National Monument. To look at the full-size images, just click on the thumbnails below:
|
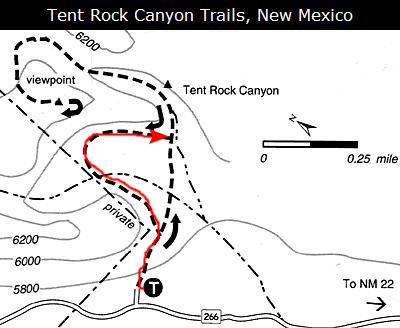 |
We began our hike along the Tent Rock National Monument Cliff Trail at the BLM parking area. We followed the sandy trail, marked with National Recreation Trail signposts, about 100 yards to a junction and then bore left. The trail climbed up to the base of the beautiful, banded cliffs that form the walls of a natural amphitheatre.
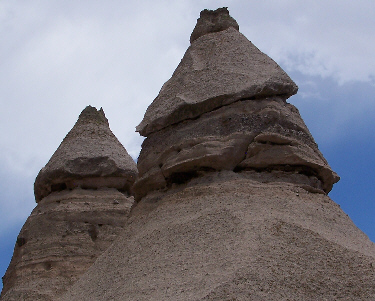
The canyon takes its name from the surrounding weird towers of tuff capped by harder, more erosion-resistant rocks. The cap rocks offer some protection to the crumbly tuff directly beneath, resulting in a hoard of conical spires roughly shaped like tepees. Over the years, these tepee shapes have been worn away in many cases, leaving the caprocks perched precariously on a now very thin supporting structure of tuff. These tent rock formations vary in height from a few feet to 90 feet. For example, Fred took this picture of one of these very odd formations first in normal view and then in closeup. You can see that the formations almost look constructed.
|
|
|
To view the slideshow, just click on the image at left and I will open the slideshow in a new window. In the slideshow, you can use the little arrows in the lower corners of each image to move from one to the next, and the index numbers in the upper left of each image will tell you where you are in the series. When you are finished looking at the pictures, just close the popup window.
|
|
I made a movie of the tent rocks that may give you a better impression of what it is like to stand in the middle of this unusual formation, and you can use the player at left to watch it.
After passing alongside the tent rocks formations, we ascended a bit on the trail and were rewarded with some excellent views of the formations. Here are thumbnails for the best of these views; to view the full-size image, just click on the thumbnail:
|
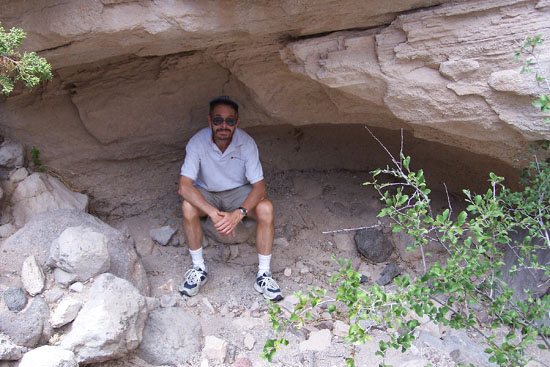
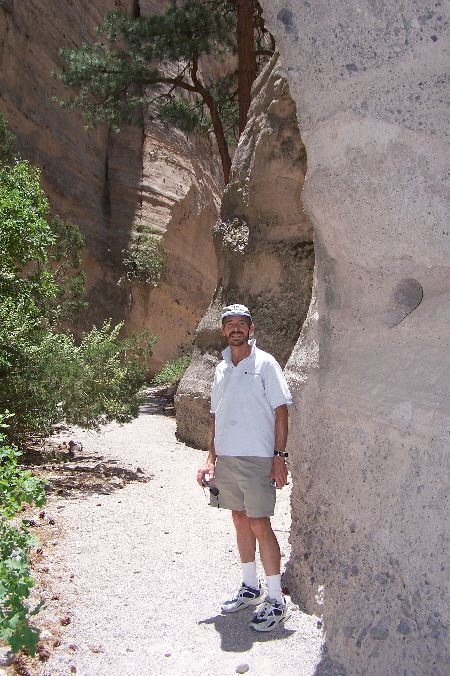
As the trail wound along the base of the cliffs, we came upon a cave that the trail guide said showed signs of use by Anasazi/Pueblo people. We couldn't really climb up to the cave to look inside, and the flash wouldn't reach that far, so we don't know just how deep the cave might be. But it isn't a cave in the usual sense, just an unusually large hole in the tuff. Using the cave as a backdrop, I took a picture of Fred and he took a picture of me. And from a little further down the trail, Fred got a view of some folks behind us on the hike looking at the cave.
 |
 |
 |
 |
 |
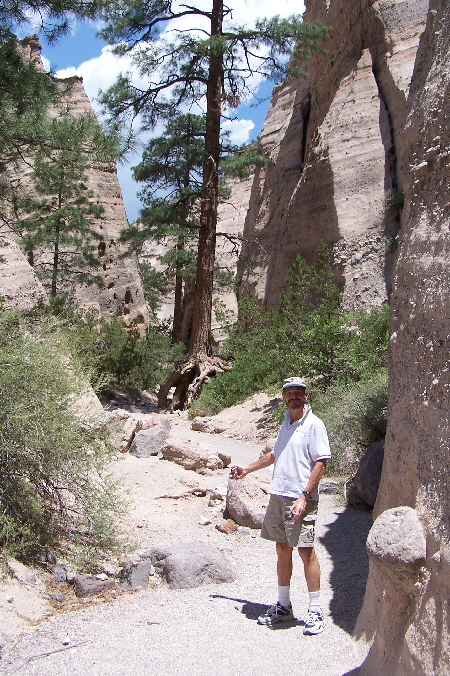
After we left the tree-shaded area at the beginning of the trail, we were walking through a canyon growing progressively narrower. The trail was passing between high walls of banded volcanic deposits as the canyon alternated between narrow and open sections, but we eventually found ourselves at the entrance to a slot canyon.
|
|
|
|
After the short slot canyon, we reached a point where hikers must crawl under a boulder to continue. Most people crawl through the crevice under the boulder (which is not really a problem for adults or kids), but I saw an opening off to the side that would let me crawl up through the space beside the boulder. I could hear that there were people on the other side of the boulder, and I thought I might be able to come up behind them and surprise them, but when I emerged from the crevice, they had moved on. On the other side of the open area beyond the boulder, there was a stone stairway that I thought might be a shortcut up the trail, but it turned out to be a dead end.
 |
And in the next section of the trail, which we traversed under gathering storm clouds and some lightning and thunder, we passed through an amazing section of these caprocked tepee formations. Below are some thumbnails which, when you click on them, will open full-size images of these amazing rock formations at this point in our hike:
|
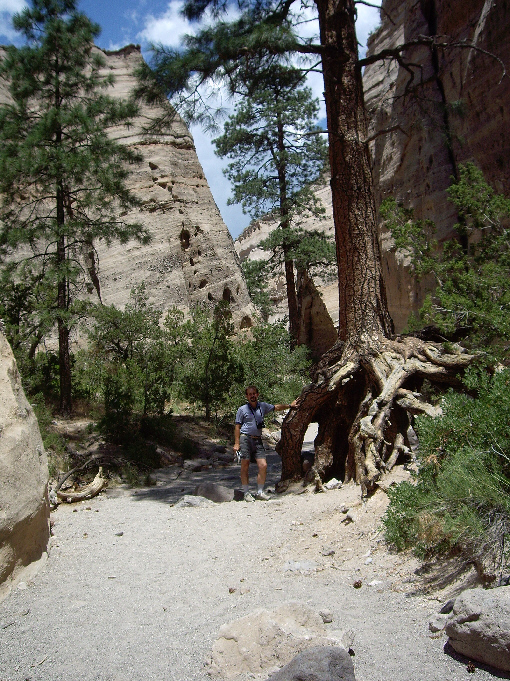
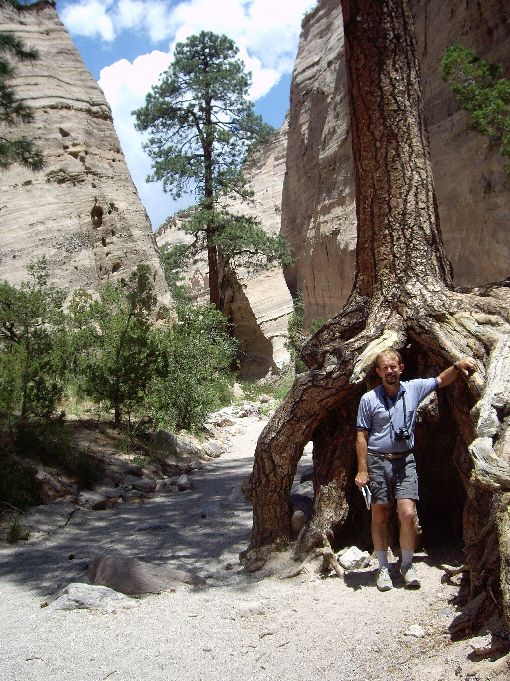
The trail led on up behind me, and it climbed steeply for a ways before opening out into another arroyo. This one seemed to be guarded by what looked like a giant stone rabbit, shown here with Fred.
It was at this point in the hike that the gathering storm clouds decided to begin showering rain down on the trail. While it looked as if the storm would only last a short while, you don't want to be out in the open or up on a ridge when there is lightning about, so I looked around for a shelter we could use while we were still down in the canyon.
|
Once the rain stopped, we emerged from the shelter and continued hiking up the trail, working our way up to the ridgeline a few hundred feet above us. In that last picture, you could see some other hikers working their way down the trail. I took a couple more pictures of Fred on this section of the trail, just below the ridgeline, and you can see those pictures here and here.
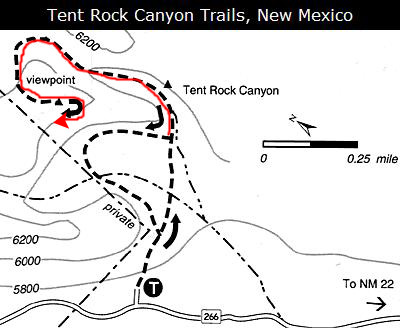
Just below the actual ridgeline, the trail took a turn along the ridge, rather than further up, and the trail lead along the east face of the ridge offering views of the tent rocks below and the landscape to the east- towards Santa Fe. Here are some of the pictures we took along the ridge, here, and you can see the full-size images by clicking on the thumbnails:
|
|
|
Having worked so hard to get up here, we stayed and enjoyed the views and the breeze for quite a while, taking lots of pictures. I've picked eight of the best ones to include here, and I hope you will look at the full-size images by clicking on the thumbnails below:
|
Well, we spent quite some time at the top of the ridge before we headed back down the trail. When you're climbing up the trail, you're usually staring at the rocks ahead of you, but when you are going down you seem to get a whole different view of things. For example, we hadn't noticed on the way up how the slot canyon ends at the boulder and then you climb up, out of the narrow canyon. Going back, we could see that there is a defined entrance to the canyon- an entrance you can see clearly here in these pictures of myself and Fred. Once you enter the crevasse you are inside the almost roomlike canyon. Of course, I think that making your way through the actual slot canyon is the most interesting and impressive part of the hike. I know you might have watched some films on our way up, but I made another good movie of our walk back through the slot canyon; use the player below to watch it:
|
|
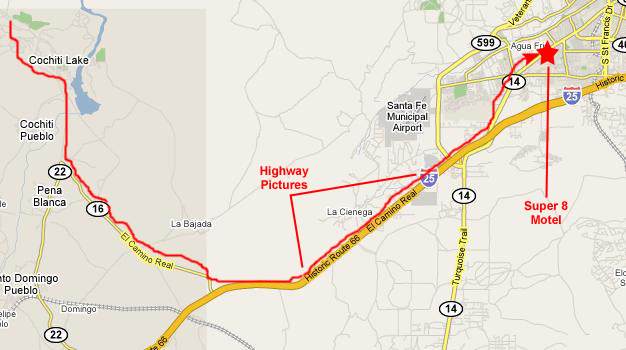 |
Along the route, Fred took some interesting highway pictures looking north towards Santa Fe until our exit on Cerrillos Road. I've put thumbnails for the best of these views below; to see the full-size image, just click on the thumbnail:
|
 |
Hiking at "Ski Santa Fe" Ski Area
 |
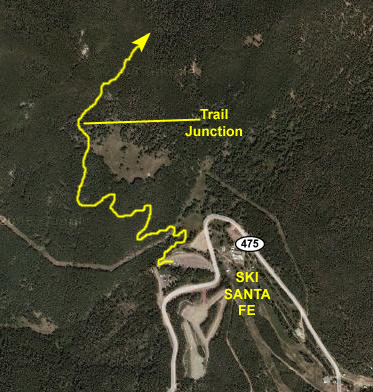 |
Eventually, the trail reached a saddle junction, where we passed a couple of folks returning from a different trail than the one we were going to follow. We made a turn and headed off up another steep portion of our trail. By this time, it was getting quite dark as the clouds were thickening, and the trail ahead was starting to look a bit dark. But it wasn't evening, just rain, and, sure enough, about fifteen minutes past the trail junction it started to rain. We tried to judge whether the storm would quickly pass, but it seemed as if it was settling in, and so, reluctantly, we aborted the hike and headed back back down the trail towards the junction. It rained lightly but steadily, and at the junction we made the final decision to head on back to the car. It was on this hike that we began our habit of taking an umbrella on our hikes, or at least wearing a rainproof jacket. For the rest of our trip, it seemed as if the pattern was good weather until about two or three in the afternoon and then rain showers after that. More than once the umbrellas kept some of our hikes from being complete washouts (no pun intended).
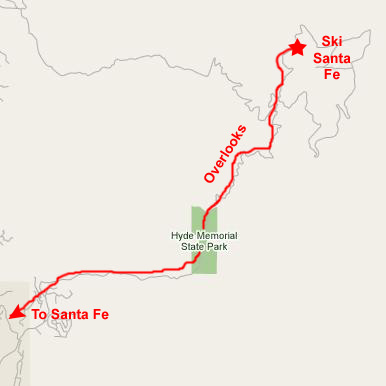 |
All along our hike, and at a number of the overlooks, we enjoyed looking at the beautiful stands of aspen trees, with their distinctive white bark. We don't see those anywhere around Texas, which is a shame. At one of the overlooks, the whole reason for the overlook was to see these aspens, and there was a very interesting informative sign about them. You can read what that sign had to say here.
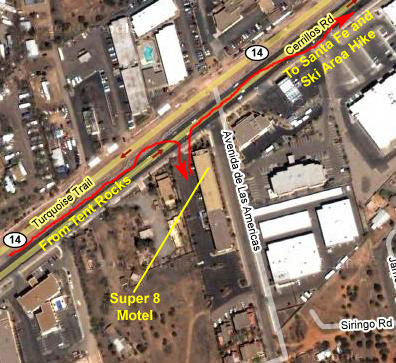
We drove back to the hotel in Santa Fe through the deepening twilight, got cleaned up and then, following a recommendation of the desk clerk, found a really good Mexican restaurant just up the street from where we were staying. Then it was a stop at a new Baskin-Robbins, one I'd not been to, and then some sleep.
You can use the links below to continue to another photo album page.
|
July 16, 2007: New Mexico/Colorado Trip Day 3 |
|
July 14, 2007: New Mexico/Colorado Trip Day 1 |
|
Return to Main Index for New Mexico/Colorado Trip |